Where Do You Start for a Lithium Battery and Coach Electrical Upgrade?

SSTraveler

2014 LTV Unity Murphy Bed
The final parameter to consider, is Solar charging. I did not take the Leisure solar option, but rather wanted to install my own system which is much superior to what Leisure offers. The best part is that I did it myself, for a fraction of what Leisure is charges! I currently have 200w of Renogy glass solar panels, Victron SmartSolar 100/30 Bluetooth MPPT and Victron BMV-712 battery monitor. I have 2-Renogy 100w monocrystalline compact glass panels wired in parallel, which means the output voltage form each panel does not add, but the output amperage does. So their output to the solar controller is about 17v and 12a. Lithium batteries need a higher voltage to push the charging amps to the battery. Therefore I need to wire my panels in series, which means the voltage adds but the amperage doesn't. So that would give me about 34v and 6a panel output. I'd really rather have at least 10a output. So I think I will add 2 more Renogy 100w monocrystalline compact glass panels, with each pair wired in series (34v/6a) and then those 2 pairs wired in parallel (34v/12a). This will suit me well. I really consider solar to be more for maintenance, Leisure Travel Vans just don't have the roof space for any sizable solar contribution. So for me 400w is fine and since solar panels aren't covering every available space on my roof I can still move around it to clean the panels and the roof, and do maintenance.

For those who did take the Leisure solar option, my advice is to replace the flexible panels, since they have been proven to damage your roof, with longer lasting, more efficient, higher quality monocrystalline glass panels and replace the GoPower PWM solar controller with a Victron 100/30 SmartSolar MPPT Bluetooth Controller. The Victron controller has an advanced Lithium battery setting and is highly reliable and the most efficient battery charger on the market, IMHO!

Installing a better solar system isn't that hard and can be done without drilling any new holes in the roof. If you search the Unity section of the Forum, you'll get lots of installations to pick from and pattern your own installation after. The elements of the solar system that Leisure installs can support up to 400w of panels with no other changes. So it's very easy to expand a 200w option to 400w. At a minimum, I recommend replacing the GoPower controller, since it is a very poor quality device for Lithium battery charging. It's very easy, the 4 wires connected to it simply attach in the corresponding positions on the Victron controller. Here is a picture of the back of the GoPower, as you can see it's just 4 wires. You should also take the opportunity to add 30a circuit breakers (can also be used as an on/off switch) to both sides of the controller so you protect the wiring and have the ability to isolate the panels and/or controller from the batteries. You can damage a solar controller if you do not disconnect the panels output to it before disconnecting the batteries. The panels can burn up the controller making it the load when the batteries, which are the actual load, is disconnected first. Then reverse to put the panels back on line (connect batteries, connect controller, connect panels). Without circuit breakers or switches and fuses the only way to stop the panel output power is to cover them from the sun. Quite a hassle!

For circuit breakers on both sides of a new Victron solar controller you should consider one of these styles, https://www.amazon.com/Tocas-Surfac...lja1JlZGlyZWN0JmRvTm90TG9nQ2xpY2s9dHJ1ZQ&th=1 or

https://www.amazon.com/Tocas-Surfac...jbGlja1JlZGlyZWN0JmRvTm90TG9nQ2xpY2s9dHJ1ZQ==.

It's important to get a dc circuit breaker that is rated for up to 72v because depending on how you wire your panels together, 400w could have as high an output voltage of 64v (24a). Since the Victron controller is Bluetooth enabled you don't need to install it so its visible, because you read it's data from a Bluetooth connected device like your phone/tablet. You just want to be able to get to it and the circuit breaker when you might need to. I installed mine in my TV cabinet. I added magnets to my fire extinguisher so it's easily removed for access!

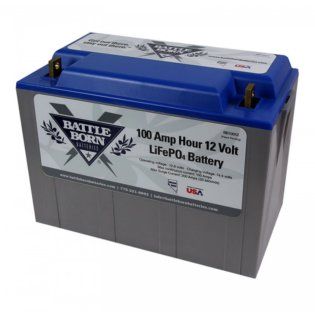
I think I've covered everything you need to consider/know when planning to switch to Lithium battery(s) and/or modifying your coach electrical system to expand the use of the Lithium battery(s) to more or all of the coach's equipment! Now on to defining and buying everything you need for the installation, and the actual installation! Stay tuned for my installation of a Lithionics 315ah battery, Sterling 30a DC-DC charger, Xantrex Freedom XC Pro 3000w with Remote Display, and the addition of 200w of Renogy solar panels on another thread!
 

Attachments

Last edited:

harrysalit

2019 Wonder FTB
SSTraveler, I have 2 BBs and the Sterling 30-30.
some where on here it showed to pick up the 2 battery bank hot leads at the Sterling for a Trik l start charging.
in my 2019 Wonder those 2 leads are not hot until I start the engine.
I installed the Sterling, did I do something wrong?
 

SSTraveler

2014 LTV Unity Murphy Bed
I'm not sure which leads you are referring to, but there should be an ignition wire connection, which means the Sterling won't come to life until you start the engine. Then it won't send alternating charging to the house batteries until it senses the ignition on signal. On my 2014 isolator solenoid, it shows corresponding battery voltage on each side, even with the ignition off so if your talking the battery connections to the Sterling aren't reading a voltage, I would suspect the ground connection. Try using the metal seat base as the ground. You do need to sand off some paint so you have a good metal to metal connection. I haven't installed my Sterling yet and I planned on using the white wire from the solenoid because the wiring diagram says it's a chassis ground, but I recall my Trik-L-Start wouldn't work with the ground connected to the white wire, it only worked once I moved the ground to the metal seat box.

If you haven't done so already, I encourage you to call Willie at Leisure and get your wiring diagrams, they are very informative. See his thread on how, https://sprinter-source.com/forums/index.php?threads/92289/. Once you get them please post them to that thread you can help others.
 

Attachments

Last edited:

treemaze

2020 Unity MB
I know on my 2019 Sprinter the Sterling's input isn't hot until the engine is started (or at least until the Sprinter's electronics are turned on). So that connection wasn't useful for a Trik-L-Start and I added a new wire from it to the Sprinter battery. At least on the Unity, LTV wired the Sterling's output directly to the house batteries and it's always hot.
 

lvuman

Active member
..... I opted for a Xantrex Freedom XC Pro 12v 3000w, which is a simpler, smaller, highly capable pass-through Inverter/Charger.
I think you made a great choice. When I first started searching for the best Inverter/Charger for my 630ah Lithionics upgrade, truth be known, I wanted to install the Xantrex Freedom XC Pro 3000 too. I agree the Victron is probably the top of the line if you have space and want or need all the features. In my case, it would have fit perfectly above the batteries on the outside wall of the compartment under the wardrobe in our 2015 MB model and I wouldn't have needed to use some of my coveted space in the rear, tall, storage compartment for the Multiplus inverter. The only reason I actually chose the Victron instead was the Xantrex was completely sold out and unavailable and I didn't want to wait a month for delivery.
 

msmolow

2019 Unity CB / 2018 Chas
I chose the Multiplus 3000 because I wanted the seamless integration of a single manufacturer and I already was using a Victron MPPT charge controller. I also looked at the Magnum but Victron was more advanced with integration of their components. I was aware of Xantrex but did not research them.
I relied solely on the Cerbo GX and Bluetooth app for a couple of months before I installed the Touch 50 remote. I have found the single tap on the conveniently located Touch 50 much more efficient than using my phone.
I have read the postings here on the Xantrex and it probably would have been a good choice for me but the convenience of the Touch 50 as a central reporter for power consumption, solar, inverting and battery status still carries the day for my needs.
The phone app did all that too, it just took more effort.
 
Last edited:

SSTraveler

2014 LTV Unity Murphy Bed
I like the option of the Bluetooth connectivity on the Xantrex or Victron components, but I also like that Xantrex offers a simple remote display as well. The Xantrex display offers the simplicity I'm looking for by just having a simple on/off button. So whether I want the extensive displays and information the Xantrex Bluetooth App offers or just the simplicity of an actual display with ease of accessing the most used features the Xantrex is easy and small. Don't get me wrong, I love Victron stuff, but in considering that the Lithionics battery has such an advanced battery monitoring system, I realize it doesn't need to be paired with an overly complicated integration system with more battery monitoring. In my comparison the inverter choice seemed to boil down to smaller sized and more intuitive/simplistic compared to larger, more components, complicated, harder/more time to install, but beautifully integrated. So I picked the Xantrex inverter, smaller, easy and simple as the right compliment to the magnificent Lithionics battery!

 
Last edited:

lvuman

Active member
I like the option of the Bluetooth connectivity on the Xantrex or Victron components, but I also like that Xantrex offers a simple remote display as well. The Xantrex display offers the simplicity I'm looking for by just having a simple on/off button.
I'm a little envious. I really like the Victron Multiplus I installed but am drawn to the programming simplicity of the Xantrex. I wish I could completely program my Multiplus without having to connect with an optional MK3 device. That seems antiquated with technology that is available today. Plus, there are so many things that can be programmed on the Multiplus, I find it a little overwhelming and I'm still not confident I have it programmed optimally. The Xantrex Bluetooth connectivity programming seems super simple and straight forward. I'll be eager to hear your firsthand experience with the Xantrex when it's installed and working.
 

treemaze

2020 Unity MB
I'm a little envious. I really like the Victron Multiplus I installed but am drawn to the programming simplicity of the Xantrex. I wish I could completely program my Multiplus without having to connect with an optional MK3 device. That seems antiquated with technology that is available today. Plus, there are so many things that can be programmed on the Multiplus, I find it a little overwhelming and I'm still not confident I have it programmed optimally. The Xantrex Bluetooth connectivity programming seems super simple and straight forward. I'll be eager to hear your firsthand experience with the Xantrex when it's installed and working.
Completely agree that the MultiPlus is complex to set up (you can even add some if-this-then-that type programs to it). It's also often difficult to connect the cable necessary to program it. Even turning it on and off could be easier.

There's some help for all these problems. For the complexity, I followed the MultiPlus programming guide at pkys.com in the Technical Pages section. Instead of the MK3 device I find it easier to program the MultiPlus through the Cerbo's VRM page at vrm.victronenergy.com. Under the "Device list" category, use "Remote VEConfigure" to upload/download settings. I know, still not as easy as a Bluetooth app.

This Multi Control panel would make it easy to turn the MultiPlus on and off and adjust the current limit. It can be used instead of or in addition to a touch screen. Sometimes I wish I installed one but there's never enough space.
Victron Multi Control.jpg
 

msmolow

2019 Unity CB / 2018 Chas
I found this article to be helpful in understanding lithium batteries.


hoosierrun

Active member
That has some pretty good information, especially as you get further into the write-up. Thanks. I feel like I'm doing most everything right after reading this. I should be gone from this earth before my batteries crap out. LOL
 

SSTraveler

2014 LTV Unity Murphy Bed
Here is a interesting video from a Leisure Owner going through regrets that he didn't choose a Lithionics Battery! This video certainly makes my point that you need to define your battery needs, research/consider all possibilities, and definitely don't just make a choice based on price or you may have regrets!


SSTraveler

2014 LTV Unity Murphy Bed
Stephen Tartaglia, Owner/General Manager of Lithionics has assigned Jackson D'Ettorre as our Lithionics Leisure Travel Van Point of Contact, here is his contact information:
Jackson D'Ettore
Product Manager
1770 Calumet Street
Clearwater, FL 33765 USA
jackson@lithionicsbattery.com
Office: 727-726-4204 | Web: LithionicsBattery.com
 

SSTraveler

2014 LTV Unity Murphy Bed
Here are the Lithionics Installation Guides for their batteries installed with a Xantrex XC Pro 2000w and 3000w Inverters and the Victron Multiplus 2000w and 3000w Inverters. The number and type of Lithionics Batteries doesn't matter, so you fill in that blank and the rest of the installation is defined in the attached guides.
 

Attachments

SSTraveler

2014 LTV Unity Murphy Bed
Here is a interesting video from a Leisure Owner going through regrets that he didn't choose a Lithionics Battery! This video certainly makes my point that you need to define your battery needs, research/consider all possibilities, and definitely don't just make a choice based on price or you may have regrets!

20210119_044211.jpg
 

SSTraveler

2014 LTV Unity Murphy Bed
I have been inundated with questions by Leisure Unity and Wonder owners about my Lithionics 315ah Battery so here is a cost comparison sheet that may be helpful to others considering a Lithium battery upgrade. I've also attached the Lithionics full spec sheets on the 2 sizes of Lithionics Batteries that will fit in Leisure step battery boxes. I believe the Lithionics 315ah with Bluetooth internal Battery Monitor and heater fits in the step box of all Unity models and some Wonder models. Two Lithionics 125ah (250ah total) with Bluetooth internal Battery Monitor and lots of other features fit in the rest of the Wonder models.

I wouldn't dismiss the Lithionics batteries based on it's MSRP alone. Lithionics is offering promotional discounts to Leisure Owners if you contact them directly. Their Factory direct price makes their cost very close to other leading battery manufacturers and considering all the extra features it's well worth the investment. It's worth a few extra bucks to get all the advanced features and to pack as many amp hours as I can into my step compartment battery box. When you contact Lithionics, you'll see that you can get a Lithionics 315ah Lithium battery with built-in automatic heater and Bluetooth Battery Monitor for about the same price as the Leisure cost of $3770 for the 200ah Lithium battery option with external heating pad. Two Lithionics 125ah batteries give you 250ah of Advanced Lithionics Lithium battery capability in your step compartment for much less than the cost of the Leisure 200ah battery option! You are really wasting your money on the Leisure Lithium option!

The fact that you can get a Lithionics Battery for about the same price as the Leisure Lithium Option is particularly noteworthy for the 2020 and newer Unity and Wonder models because Leisure now installs a Sterling 30a DC-DC charger for safe engine alternator charging when driving and the Xantrex 2000w Inverter for safe fast charging from Shore/Generator power, both have Lithium battery charging settings! So the new Leisure Unity's come completely ready for you to do your own simple battery replacement from the standard AGM batteries to a Lithionics 315ah or dual 125ah (250ah) Advanced Lithium Batteries. No extra modifications required! This is another reason why new Leisure owners shouldn't waste their money on the inadequate Leisure Lithium battery option! Call or email Jackson D'Ettorre find out more about Lithionics batteries!

Jackson D'Ettore
Product Manager
1770 Calumet Street
Clearwater, FL 33765 USA
jackson@lithionicsbattery.com
Office: 727-726-4204 | Web: LithionicsBattery.com

One last recommendation, to verify the Leisure electrical attributes of your particular model I suggest you contact Leisure's Willie Neufeld, WNeufeld@tripleerv.com. Email him first with your VIN#, email address, and phone number and request him to send you, via email, the PDF versions of your Leisure model 120vAC and 12vDC electrical systems wiring diagrams. Then follow up that email with a call to him (877-992-9906 ask the operator to connect you to him) and leave a message on his voice-mail of what you are requesting and that you sent an email with this request, containing all your Leisure and contact information. He will very promptly send you PDFs of your wiring diagrams. These diagrams are helpful on many levels so you should get them regardless of any changes or modifications you might be considering.
 

Attachments

Last edited:

SSTraveler

2014 LTV Unity Murphy Bed
I attached the inverter support rails to my new inverter compartment floor using VHB tape. Then I placed the Xantrex Inverter on them and determined how I will secure it. I'm making a single bracket that will be screwed into the top flange of the inverter and screwed into the wall. Then with the added wiring secured to the wall, that should be more than enough to keep the inverter solidly in place. Plus I added vhb tape to the two rails so the inverter will be stuck in place to those as well. I stuck a couple of dense foam bumpers on the back wall because the Xantrex inverter has a circuit breaker reset button that I want to ensure does accidentally get tripped. As you can see there is plenty of room to run the wiring in between the wall and the inverter.
20210125_114401.jpg
 

Attachments

lvuman

Active member
I attached the inverter support rails to my new inverter compartment floor using VHB tape. Then I placed the Xantrex Inverter on them and determined how I will secure it. I'm making a single bracket that will be screwed into the top flange of the inverter and screwed into the wall. Then with the added wiring secured to the wall, that should be more than enough to keep the inverter solidly in place. Plus I added vhb tape to the two rails so the inverter will be stuck in place to those as well. I stuck a couple of dense foam bumpers on the back wall because the Xantrex inverter has a circuit breaker reset button that I want to ensure does accidentally get tripped. As you can see there is plenty of room to run the wiring in between the wall and the inverter.
View attachment 168935
Your Xantrex inverter install looks stunning! Nice job!
 

SSTraveler

2014 LTV Unity Murphy Bed
It's easy to get to from the outside through the screen. I can easy use a stiff piece of wire to go through the screen and push the reset button.
 

Top Bottom