Injector question, '02 612 T1N

B

billintomahawk

Guest
Back at it.

Changed the oil, that went along very well, made me a little sad becouse it was cold but the water jacket heater was plugged in so it wasn't completely ambient. Then I pulled an 'Owner' an the transmission oil. That's the recommendation of a forum member to drop what tranny oil is in the pan...a minni-transmussion service every oil change, then every fourth change drop all of it and the pan, etc. Got out 2.2 quarts quickly, buttoned things back up and refilled after I measured what drained. Quick and easy.

Thanks Owner!

I'm curious to see how this mini-change works, I am getting a little RSN.

This is important
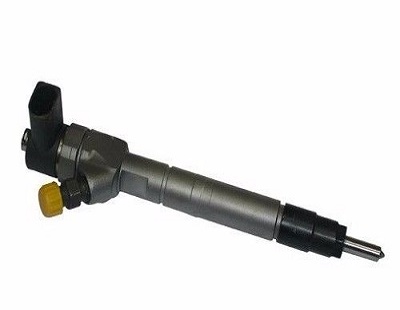
Next I went fishing in #1 and #5 holes..
e injectors left the seals behind
I got a couple of hook ups.


Mechanics wire pounded flat and bent
Got all 5 now.

It started snowing but I don't care. No more crawling under until next year.

Guerrilla mechanics for sure.

Thanks for the support.

bill
 
Last edited by a moderator:

tbuyan

'04 3500 140" low roof cargo w/dually delete
That looks like a great kit. I pretty much created all those items when I replaced an injector a couple years ago. Everything except the "blanking plug", that is. I just dropped an oversize ball bearing down the bore to plug the hole while I did the bore cleaning and seat resurfacing. Retrieved the ball bearing with a magnet. Yes, there was a little pucker factor the first time I dropped that ball bearing down the hole.
 
B

billintomahawk

Guest
That looks like a great kit. I pretty much created all those items when I replaced an injector a couple years ago. Everything except the "blanking plug", that is. I just dropped an oversize ball bearing down the bore to plug the hole while I did the bore cleaning and seat resurfacing. Retrieved the ball bearing with a magnet. Yes, there was a little pucker factor the first time I dropped that ball bearing down the hole.
That's pretty darn brilliant.
Not sure how my plug will fit?

I'll be digging thru my old shotgun cleaning kits for an eyelet ends to hold a piece of paper towel for a final clean and wipe.

Then there is the tip area.

A little junk is bound to find its way into the cylinder but the last step of Q tip and clean diesel makes sense to me but I haven't decided...difficult to see at all...my fingers are short.

I don't have a probe type camera.

bill
 

tbuyan

'04 3500 140" low roof cargo w/dually delete
I don't remember for certain, but I think I used a 12ga. wire brush to clean the bore and a .30 or .357 brush for the injector tip hole. Yes, no doubt some swarf fell into the cylinder. But step 1 is to get the piston to tdc exhaust stroke (aka overlap; both valves open slightly). Then adapt to the shop vac a length of fuel line small enough to fit down the hole. The open valves ensure sufficient flow and turbulence in there to suck it all out.

BTW, find tdc by turning the front crank bolt from below while a close personal friend observes the wood dowel (or long #2 phillips screwdriver) you carefully inserted down the injector hole. Turn the bolt slowly while the piston pushes the dowel up, and stop at the top. Turn the bolt clockwise only; backing up is not allowed.
 
B

billintomahawk

Guest
tbuyan,
The care and concern you showed your engine was beyond me.

The first thing I did was run all the hold down bolts on my wire wheel. After that I muck out the thread in the cylinder head with Q tips. This turned tricky because I had to elongate the the tips of the Q tips to fit down inside to the bottom of the threads. Up came the liquid penetrating fluid so I ran in tips until they came out dry. Next I ran in the old bolts and backed them out 3-4 times checking for dirt. You can feel them bottom out. I left then in the head to protect the threads from further contamination when they came out clean. I worked my way thru all 5 front to back.

OK, take a break!


Now the bores.
Man I had good intentions...that quickly went to hell.

I swabbed out the bores with paper napkins. I tried out the tip plug but it was way to scary to rethread so on 3,2 and 1(back) I just skipped that. The copper wire brush was a godsend and did it's job on #5(front) but on all the rest my electric drill was too tall to fit under the tunnel and run the mandrel so I had to resort to using the 'by hand spin method' on the brush, then this.


Suck it up with the the shop vac.

I did all the bores, the wire brush, with a little pressure and coaxing drops to the bottom and the suction tube(3/8" fuel line) fits further down in, about another 1/2 inch.

Here in the image you caaan see the 3 stage drop in size to the tip.


It was pouring rain and thundering plus some snow. Miserable and hard on this old
moto-cross racer's knees so I called it a night when the deer did. Plus there was still more snow to shovel.

I'll go back at it tomorrow. Spin and suck and then...


Thanks for the encouragement.

bill
 
Last edited by a moderator:
B

billintomahawk

Guest
Early morning wake up call from Williams Diesel.

Three injectors failed. One over fueling at lower rpms, one at full running speed, one had other 'issues', maybe spray pattern.

So they will rebuild and have them out on the Fedex return today.

118K miles, hard start, rolling idle, smoke on acceleration and 'the clank' on acceleration.
Explained.

And to add insult to injury my 'spare' is for the 647 engine. Who knew?
It was tested and passed and will come back certified in case anyone needs a spare or wants to trade for a good 612 injector.

I will have $75 in it plus shipping.

$$$$$$

bill
 
Last edited by a moderator:
B

billintomahawk

Guest
I'm calling it ready for injectors.

A couple of miscellaneous pics and a video.

https://williamshockley.smugmug.com/Injectors-Sprinter-612/i-jPN2Rb7/A


Mirror shot of the bore.


The injector bore cleaning kit was kind of a bust. The brushes were nice, you need an angle arbor drill to run them hard and the sticky sanding patches needed to be smaller for the 612 so I made a dowel mount, glued and then cut the discs smaller, then they worked.

None of the carbon I found was hard. Maybe it was the penetrating mix I used? Anyway the bores are clean now and as ready as I can make them.

My injectors shipped out so I hope to be running next week.

So far a real learning experience, maybe just a small celebration.

I figure when it's all said and done Dennis at Linden Engineering saved my ass for getting those injectors loose so this is (again) for him.


bill
 
Last edited by a moderator:
B

billintomahawk

Guest
Got the injectors yesterday so today became the day.
Do or die. Stretch, strip or snap.

So 5 steps forward. Got all the injectors in, bolts stretched, fuel pipes hooked up. Everything went exactly as it should.
I torqued to 62 inch pounds and then stretched 90+90.

The machine fired up on the third 10 second burst with the starter, no priming needed. The idle was a little rough at first as the engine warmed up. That didn't take all that long because my freeze plug heater was plugged in. Working on a warm block was so nice. It ran nice, less vibration, no smoke, no stink.

But.
Fuel was pooling in the injector well of the most forward cylinder. What the hey??
Soaked up the fuel with paper towel as it accumulated, about a teaspoon every 2-3 minutes. I completely checked the fuel pipe connection and the leak back connection. No leak there. All other injector wells were dry.

Called Williams Diesel, they asked me to recheck everything again and I did but no relief, fuel continued to well up out of the bore with the engine running. An internal injector leak is a remote possibility.
So I pulled the injector, easy because it is right up in front, turned out to be one of the rebuilds.

So the injector is on its way back to Florida and to the flow test bench.

And this is to be continued.

bill
 

Nautamaran

2004 140” HRC 2500 (Crewed)
Bah! So close to the finish line...
Glad Williams has your back.

Be super careful investigating HP fuel leaks, keeping your body bits well clear while the engine is running.
Paper towel wrappings are a good tool to isolate sources... fingers are NOT!

If fuel is welling from below you’ve likely got a cracked injector body or perhaps a spec of contamination on the nozzle seat, but I’d expect Williams will get you sorted.

Happy Halloween my friend!

-dave
 
B

billintomahawk

Guest
Glad Williams has your back

Happy Halloween my friend!

-dave
Dave,
Forgot about that darn Halloween!!!

Thanks for the reminder and the caution.

Meanwhile if anyone has a 'good' (or a core) 612 injector, please PM me.

I may need parts and I'd like to have a serviceable spare to carry.

bill
 

lindenengineering

Well-known member
Dave,
Forgot about that darn Halloween!!!

Thanks for the reminder and the caution.

Meanwhile if anyone has a 'good' (or a core) 612 injector, please PM me.

I may need parts and I'd like to have a serviceable spare to carry.

bill
Well I have plenty of cores.
I might even have some good serviceable ones. (Take outs)
I even have three "Dipaco Crapo" new ones I refused to install somewhere in the parts area !

I am always sending out injector sets for test to our local Bosch FIE dealer now sadly reduced to crap service ,crap wine & crap cheese local dealer.
Recently bought out by a Wisconsin based FIE vendor, the "cheese" overall quality is crap ! (excuse the pun) Basically like trying to compare a Rebluchon or Normandy Camembert to a slice of yuk processed imitation cheese by Heinz !

For that reason I only install injectors from the MB dealer.
Coming with a nationwide warranty it means an instant turn around saving wheel stop time or in my case my and yours having to send injectors to Wisconsin (in my case) if found defective within the warranty period.
Let me know what is your flavour ?
Dennis
PS Rembluchon, enjoyed with glass of Fonseca bin #27 ,used to be an exclusive from Harrods, but now available in the "Colonies" for us rebels at any good wine store . :devilish:
 
B

billintomahawk

Guest
Injector back from Williams Diesel.
The fuel leak was caused by improper assembly of the injector and has been corrected, the injector is installed.

Testing will commence and I'll update this thread with some general observations but already a couple of things stand out.
The clank on acceleration is gone.
The engine runs smoothly and quietly and accelerates without hesitation.

There is a puff of black smoke on increased revs at idle but no stink of unburned fuel.

I need to get out on the open road in daylight to see what's really happening but the machine feels young again.

I have a GDE tune and I'm an idiot because at the last fuel up I mistakenly filled the tank with Diesel #1.

More to come.

bill
 
B

billintomahawk

Guest


The old 612.
All injectors are in and no leaks.
Done and all is well. Road tests are 100%. Smooth at 70 mph.
Easy starts, clean acceleration.
No more big diesel stink on startup.

But most important the clank-clank with slow acceleration under load is completely gone and I am completely satisfied about that.

Hats off to Williams Diesel Service in Ocala, Florida.


This engine that barely ran three years ago is back from the dead and I have learned so much in the process.
I owe every bit of my knowledge to the T1N Sprinter forum and the members and to their kindness.

The last glitch was the fuel pipe on the rear cylinder. It leaked.
I tightened it hard a dozen times and it continued to leak. Put on gloves because it hurt my hands.
Don't do that!!

I loosened and tightened 4-5 times to reseat it and then snugged it down, 'Voila' and it stopped leaking, so happy!
Everything dry. The right way.

So for all the 612 owners who come after me and read this, go back and reread my disassembly steps for your clues, shout our to Dave and Dennis and Aqua and DD and HK and jrod and Owner and MD and trc and tb and sip and mms and all my other betters I forgot here and elsewhere.

Say thanks to the Sprinter gods three times.
Go for it.
And Good Luck!!

bill in tomahawk
 
Last edited by a moderator:
'02 612 Would like to utilize injector puller, but this doesn't want to disassemble easily. Any guidance would be much appreciated...
injector 2.jpg injector1.jpg
 

Top Bottom