Flexible Solar Panels on the Roof's "Nose Cone"

OldWest

2004 T1N Westfalia
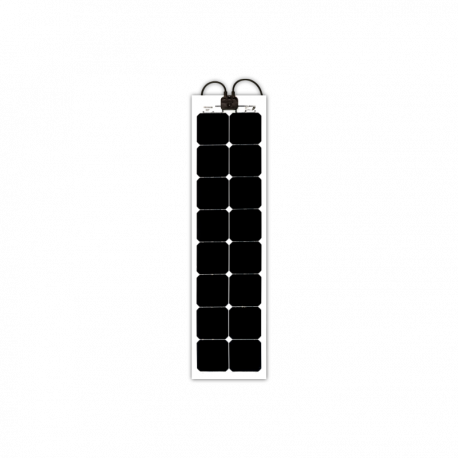
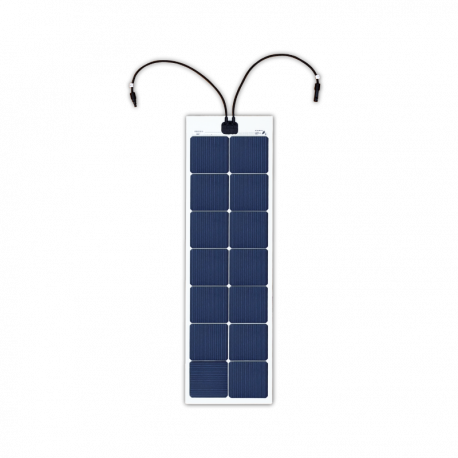
3M Dual Lock is like Velcro, except with plastic mushrooms. So the solar panel can be easily separated from the fiberglass top, and put back into place (multiple times).

The adhesive for each side is the same type of adhesive used for the different 3M VHB dual-sided tapes. That adhesive may be tough to remove.

There are many different versions of 3M Dual Lock. So you have to choose the right one (differences in number of plastic mushrooms on each side, type of adhesive, etc.).

The typical 3M Dual Lock is about 1/4 inch thick when both sides are pushed together. That creates an air gap where the 3M Dual Lock is, as well as a bit of leeway in depth.

There are also low-profile 3M Dual Lock versions which are about 1/8" thick or less.

For flexible solar panels using 3M Dual Lock, installers suggest that additional spacers or support be used in the middle of the solar panel to account for the 1/4" thick 3M Dual Lock on the perimeter. The suggested spacing is no less than 8" and in some cases, between each row of solar cells.

Spacers can be additional 3M Dual Lock (installed on one side or both sides) or strips of twin-wall polycarbonate.
 

OldWest

2004 T1N Westfalia
While the 3M Dual Lock creates a 1/4" air gap, a larger air gap may be better.

Installers of semi-flexible solar panels may adhere the panels to a 6mm or 8mm minimum or thicker twinwall polycarbonate panel, then attach the polycarbonate panel (with solar panel) to the roof using 3M Dual Lock, mechanical fasteners (through the polycarbonate and the solar panel grommets), etc.

The polycarbonate panels add an air gap as well as rigidity/strength to the solar panels.

Instead of the panels, some prefer to use polycarbonate strips so there is less heat bridging.

I have not seen anyone suggest using rainscreen or similar house building outer wall material.
 

Jan M

Active member
Since the install behind the Heki was very easy standing through the opened hatch with assistance from my wife on the scaffold I think we'll try the same method for the area in front of the Heki. This will require removal of the hatch top which also is quite easy, I've done it before.
IMG_5502.jpg
I'm looking at removing the hanging kitchen cabinet to gain easy access for routing the wires. The description in the repair handbook doesn't look to bad.

When I have access there I'll also install a combined WiFi-/2G/3G/4G MIMO antenna from Panorama Antennas. I'll wright more about this in another thread.
LPMM_LGMM-1-800x600.jpg
 

Jan M

Active member
Would this tape from 3M be a good choice for securing the front edge of the solar panel in front of the Heki from lifting in high speed? And also for securing the wires on the roof?
3mtm-extreme-sealing-tape-4412n-translucent-80-mil.jpg
 

OldWest

2004 T1N Westfalia
1. Don't have any info about that tape. I used Lexel caulk on the front leading edge with a break for a weephole. I figured the Lexel would prevent air from going between the mushrooms of the 3M Dual Lock.

2. For the cables, I used self-adhesive tie mounts and cable ties. The adhesive was a version of the 3M VHB tape.

You'll want good ones that can stand the UV sunlight. Cheap cable ties will break. Also, the adhesive.should be good.

Added Note: AM Solar suggests cable ties and tie mounts, plus Dicor Sealant.


Search for outdoor versions of:

Self Adhesive Cable Tie Mounts - 3M Strongly Adhesive-Backed Zip Tie Base Holders for Home, Office Cable Wire Management(19.5mm x 19.5mm, Black,

100pack)
 
Last edited:

Camp

Sprinter Westfalia
Thanks to everyone for the ideas so far! It’s always amazing what an excellent group of Westy enthusiasts there are on here.

I’m almost ashamed now to say what I had been contemplating doing. I couldn’t decide if the best option was portable solar, “nose cone” flexible solar, or solar in place of the AC. However, I figured the only way I could be happy with flexible solar visible on the front of the roof was if it was semi-attractive. That led me to search for as clean looking solar panels as possible. In my mind, these all black panels without grommets from Lensun Solar were the answer:


With how limited the lifespan of even big name flexible solar still seems to be, and the fact that they usually have large white areas, I’d imagine the all black ones will fare even worse.

The 170w panel OldWest suggested, installed in fashion similar to what onemanvan did, probably is the best option for solar on the “nose cone”. That being said, eliminating the AC and installing rigid panels like Hotratz did looks like a good way to have reliable solar on the Westy (If only we all had a nice AC free Euro Westy roof like Jan M). And then again, hanging portable solar on the bathroom wall like Kiltym provides the cleanest install of them all. Decisions, decisions...
 

Camp

Sprinter Westfalia
I replaced my system with rigid panels - 2 x 100W Renogy and a Flexcharge NC30L12 controller. Since I don't have an AC unit I installed the panels over the flat roof on two aluminum rails that I have secured to the factory anchor points.
Is that a marine hatch you’ve run your wires through, Hotratz? I was examining the pics more closely and just noticed that it appears like you have something like that filling in the AC hole.
 

Hotratz

Member
Is that a marine hatch you’ve run your wires through, Hotratz? I was examining the pics more closely and just noticed that it appears like you have something like that filling in the AC hole.
I'm not sure - hadn't even thought of it. I don't know exactly how the AC unit is mounted as Its how it was when I bought the van. The previous owner had the work done.

My roof is bit of a mess. One of these days I'll get around to cleaning things up. I need to figure out a cost effective solution to refinishing the fiberglass. There must be a middle ground between an $8000 pro refinish and a crappy looking $100 Billy-Bob Clampett job. I don't know how well it holds up to heat and UV.
 

OldWest

2004 T1N Westfalia
My guess is as follows:

The air conditioner sits on an elevated base. That base can be removed or the opening at the top can be sealed off.

In Hoftraz' Westfalia, it looks like the air conditioner base was left in place and the opening sealed off. The solar wires then went through the closed off top.

Search for Ted Grozier's thread in this subforum on removing the air conditioner. He posted photos of the removal process of the air conditioner, including photos of the elevated base or "lip."


Camp

Sprinter Westfalia
Thanks to both for the info. I can see the resemblance now between the two AC removals. The fact that no new holes have to be cut in the roof make this an ideal way to route solar wires.

I have been hesitant to remove an AC that still will work, but it’s not really used here. I do now almost want to find if a rectangular marine hatch exists that has similar dimensions to the AC base, though. It would be a lot easier than covering the hole with fiberglass or DIY sealing the base if removing the AC.
 

Camp

Sprinter Westfalia
I need to figure out a cost effective solution to refinishing the fiberglass. There must be a middle ground between an $8000 pro refinish and a crappy looking $100 Billy-Bob Clampett job. I don't know how well it holds up to heat and UV.
I thought I remember seeing a thread with a blue Westy where the top had been sprayed with a lighter color bed liner (like Line-X). Maybe it was on the Yahoo group. While still not cheap, that would be a fairly cost effective way to do it.
 

Jan M

Active member
Front panel in place. I need to buy even more 3M Dual Lock and double up on the side that faces the Heki. This is where I get a problem with bulging due to the double-curved roof. Otherwise the install looks clean. It was easy working through the removed hatch.
IMG_5578.jpgIMG_5580.jpg
 

Jan M

Active member
Wrapped it up for the day. Waiting for more 3M Dual Lock to fix the bulge on the front panel - should be the last thing to do on the roof. I think the install came out very nice. We now have 240W solar power :)

IMG_5581.jpgIMG_5582.jpgIMG_5583.jpg
 

OldWest

2004 T1N Westfalia
Looks good. If more 3M Dual Lock doesn't flatten out the bulge, you might try a couple of things.

1. Don't know how you placed the solar panel down. If you started from front and then moved toward Heki, there may be less distribution of the bulge around the perimeter of the solar panel.

You might try removing the solar panel and then putting it back in place. When putting it back in place, perhaps try to start in middle and then move out to edges. The idea is to share the puckering/bulge along all four sides.

Or you could try starting from the Heki (the flattest part of roof) and then moving to front of Sprinter.

When the two 100 watt solar panels on my nose cone were put down, we did a dry fit first. The two panels overlapped down the centerline when trying to get the solar panels in place as flat as possible. So the distributor/installer cut the overlap off of one panel. Along the Heki edge and the front leading edge, the 3M Dual Lock is pretty even. Along the sides, the 3M Dual lock is thicker and thinner in various places (the plastic mushrooms interlock with a bit of wiggle room).

2. Another option is to make a wedge the width of the roof and put under the bulge. That might allow the entire edge of the solar panel to be flatter. You could use polycarbonate or other material.

It'd be the same idea as OneManVan who use full polycarbonate sheets under two solar panels--the polycarbonate sheets flattened out the mounting surface.

You'd just be trying to flatten out the area under the bulge. So you'd lift that edge and the corners up and then see how much added material would be needed underneath to flatten the solar panel.

3. Another possibility is to reorient the solar panel. It's hard to tell from the photos, but the solar panel looks pretty square. If it's actually rectangular, the longest part of the solar panel could go parallel to the length of the Sprinter. That might reduce the bulge.

The problem is the antenna might be in the way (the Airstream Westfalia does not have that antenna; we had an Airstream installed TV antenna).
 

Camp

Sprinter Westfalia
Wrapped it up for the day. Waiting for more 3M Dual Lock to fix the bulge on the front panel - should be the last thing to do on the roof. I think the install came out very nice. We now have 240W solar power :)
Great job! Thanks for sharing the photos of the process! The orientation of the panels and path you chose for the wires made for a good looking install.
 

Jan M

Active member
Looks good. If more 3M Dual Lock doesn't flatten out the bulge, you might try a couple of things.

1. Don't know how you placed the solar panel down. If you started from front and then moved toward Heki, there may be less distribution of the bulge around the perimeter of the solar panel.

You might try removing the solar panel and then putting it back in place. When putting it back in place, perhaps try to start in middle and then move out to edges. The idea is to share the puckering/bulge along all four sides.

Or you could try starting from the Heki (the flattest part of roof) and then moving to front of Sprinter.

When the two 100 watt solar panels on my nose cone were put down, we did a dry fit first. The two panels overlapped down the centerline when trying to get the solar panels in place as flat as possible. So the distributor/installer cut the overlap off of one panel. Along the Heki edge and the front leading edge, the 3M Dual Lock is pretty even. Along the sides, the 3M Dual lock is thicker and thinner in various places (the plastic mushrooms interlock with a bit of wiggle room).

2. Another option is to make a wedge the width of the roof and put under the bulge. That might allow the entire edge of the solar panel to be flatter. You could use polycarbonate or other material.

It'd be the same idea as OneManVan who use full polycarbonate sheets under two solar panels--the polycarbonate sheets flattened out the mounting surface.

You'd just be trying to flatten out the area under the bulge. So you'd lift that edge and the corners up and then see how much added material would be needed underneath to flatten the solar panel.

3. Another possibility is to reorient the solar panel. It's hard to tell from the photos, but the solar panel looks pretty square. If it's actually rectangular, the longest part of the solar panel could go parallel to the length of the Sprinter. That might reduce the bulge.

The problem is the antenna might be in the way (the Airstream Westfalia does not have that antenna; we had an Airstream installed TV antenna).
My initial plan was to mount the panel turned 90 degrees but you are right, the antenna is in the way (about 5 cm...).

I first fixed the panel starting from the Heki and then got the bulge in the front edge. I then started from the front and got the bulge in the edge at the Heki. WIth more and doubled 3M Dual Lock i believe it can be pressed down and stay in place, if not I have to make a wedge as you describe it.

Still it looks much better if a small bulge is at the rear edge - it gets disguised by the wind deflector for the Heki.

Thanks for your input!
 

onemanvan

Active member
The compound curvature of the 'nose cone' makes it difficult to install a single large flexible panel like the 6 x 8.
A pair of 4 x 8 panels is easier - a set of four 2 x 8 panels would be the easiest to install.
A set of four 2 x 8 panels would also offer a couple of other advantages.

1) Assuming they have built in bypass diodes 4 panels in series might be more shade tolerant...

2) It wouldn't be necessary to install spacers on the underside to prevent sagging as the 2 x 8 panels are only 10.9" wide

For example:


WestyTat

Member
There might be a "little" problem with delivery to US nowadays :)
We ordered few things from AliExpress and from China through eBay back in February - still waiting...

Just beware - check where the seller is located! Even on Amazon.

my 2 cents
 

onemanvan

Active member
There might be a "little" problem with delivery to US nowadays :)
We ordered few things from AliExpress and from China through eBay back in February - still waiting...

Just beware - check where the seller is located! Even on Amazon.

my 2 cents
That's a good point - buyer beware!

I only referenced that item as it was representative of the form, fit & function I had in mind.
In fact - that's the vendor I purchased my replacement panels from - one of which arrived defective!
Also note that they have a similar panel for sale on Amazon but it does NOT have ETFE outer membrane!

There are other similar products available - some of which would probably be more reliable - but also 5X more expensive...


Top Bottom