Sprinter Westfalia #248 Refitting

OldWest

2004 T1N Westfalia
I think a small electric water heater would be a good option.

I don't like coolant line water heaters as possibility of leaks at the joints and cross-contamination between coolant and water (although there are some non-toxic coolants which are different than engine coolant lines).

An ideal setup would have a combination of 12v and 120v in low and high wattage heater elements.

The 12v low wattage (150-200 watts) could use excess solar panel to heat the water during the course of the day.

A higher wattage 12v element could be powered by the engine alternator. Or a 120v element could be powered by shorepower or off the batteries with an inverter.

https://sprinter-source.com/forum/showthread.php?t=43355&highlight=Water+heater
 

Midwestdrifter

Engineer In Residence
Given that coolant contains a bittering compound, you would know within half a second if there was contamination. Nasty stuff. HOAT coolants (which the sprinter uses) are drastically less toxic. The change of poisoning is ridiculously low, especially if a good quality heater is used (many use stainless components).

The T1N makes tying into the cooling system easy. Take the outlet from the aux water pump below the brake booster. Run it to the heater (insulate the lines). Run it back to and splice to the existing hose going to the heater core. No cutting of factory hoses required, and only three extra joints.
 
Last edited:
OldWest ... Thanks for the reply.

That Elgena 1.6 gallon 12v water heater is interesting albeit expensive for it's size. The specs say it will heat the water up to 185 degrees, which when mixed would give me plenty of water for washing up.

MidwestDrifter ... Thank you for that explanation, which I think I understand.

The two pictures below show what I think you describe, which is stupid simple really. The short hose leaving the auxiliary water pump, that attaches to the hard line heading to the Espar, gets removed and a loop inserted in it's place with the Isotemp in the middle of that loop.

Is that all there is to installing the coolant side of one of these Isotemps ? If so I only see two extra joints/hose clamps at the Isotherm. What am I missing here ?


OldWest

2004 T1N Westfalia
Westy Variations.

1. Taller rear doors.

Probably too much work, but there is a European type Westy which has the taller rear doors of the higher roof Sprinter but the Westfalia fiberglass top. The back of the fiberglass top is cut into for the taller doors.

Don't know much about this van but it might have been a DIYer who bought a fiberglass top replacement or the leftover Westfalia NAFTA kits. Think it was a white van.

2. No upper windows.

Along those lines, there is also a red Westy without the upper wing vents.

Half-slider replacement windows would be nice but haven't seen any.


Note: Search YouTube for "Sprinter 4x4 James Cook Roof" by Alex del Oso Villa. Video shows the taller rear doors and no upper window vents.
 
Last edited:
I'm almost finished the tear out and back to neutral where/when I can start building back up the many components whose details currently prevent me from going back to sleep in the too early morning.

Yesterday I worked on tearing out the rest of the Westfalia specific wiring harness. I had to remove the headliner, drivers side B pillar and foot well to pull out the main electrical loom that contained the cable that charged the house batteries and numerous branch conductors that connected to the central computer mounted in the headliner.


Any house, whether stationary or on wheels, is only as good as it's foundation. There are a few big tasks outside of my current skill set that need attending to on my foundation - 15 year coolant system service and brake job are a couple of examples.

I'm confident in my woodworking skills, and increasingly my fiberglassing skills, but as a mechanic - I am just a monkey. Give me good directions, preferably with lots of pictures, and I can probably get the job done. Diagnosing the problem and trouble shooting during the wrenching aren't fully in my wheelhouse.

Like a lot of carpenters, I eventually transitioned to woodworking. I had my own one off solo shop for seven years. That was before digital photography, so unfortunately I have very few pictures of my work, but here's one of my design/builds. A 3'x3' cherry table, and chair with ebony structural accents. The table top spins and flips open to become a 3'x6' table. I liked the design so much, that I didn't sell them, which is how I can have a picture of them both. My ass is comfortably sitting in that chair, almost 30 years old now, (the chair not my ass) as I type this with my computer on that table.


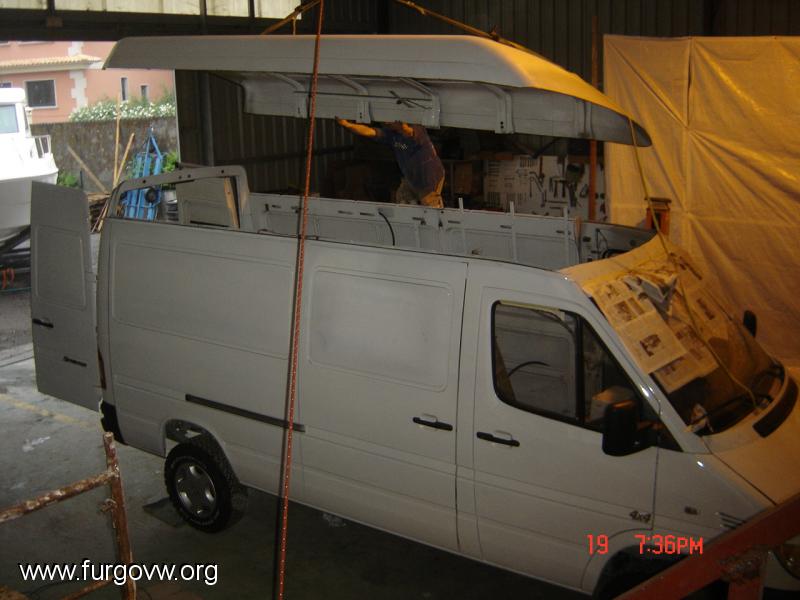
... back to my current "foundation". Here's a pic from five years ago, somewhere in Idaho. I flew from Virginia to Oregon, made the purchase, and drove back home.


Among the occasional bouts of doubt, that in my mechanical ignorance there is the possibility that I may have started a fine woodworking project on top/inside of a lemon, there is a mechanical concept that this monkey can comprehend. Rust. I've seen too many threads/horror stories whose main character is a rusted out Sprinter. Every time I head into the T1N Talk Forum, I do so fearing that I am going to click open a thread that exposes yet another potential mechanical issue that I had just moments before been blissfully ignorant of.

Fortunately, my Sprinter doesn't appear to be that type of rusted out character. I've crawled all under mine, exposed the entire floor and uncovered three of the four door wells and found nothing but the most minimal of rust...knock on wood.

The drivers side foot well, while dirty with a clogged drain scupper, once 15 years of road debris was removed, had only surface rust. For now, I will treat this with some Right Stuff rust neutralizer and move on with the many bigger tasks that are in my wheelhouse.

Ideally, I would like to deliver my rolling foundation to a trustworthy Sprinter mechanical guru and have them go over it from stem to stern to do all the proactive maintenance necessary for the next 15 years. If anybody is interested in talking about perspective applicants and/or their experiences with this type of service, I am all ears.


Last edited:

OldWest

2004 T1N Westfalia
Ooznak:

Interesting re the "James Cook" type roof made in Spain. It looks like the original Westfalia top with the various indentations.

Foster:

If Dr A (Andy Bittenbinder) near Clemson, South Carolina (used to be Pittsburgh, PA) has the time, he'd be a good source to go through the Sprinter side. He has serviced many Westies. If you want, he will teach and supervise any work you do. Might have him do a thorough review, then break-up the work into what you might do over time and what you need Dr A or someone else to do over time.

Not too far from your location--nice road trip.

https://sprinter-source.com/forum/showthread.php?t=7131

The good thing is the T1N is a better mechanical platform for repairs than the more complicated mechanically newer Sprinter models (at least that's what the experts seem to suggest on this forum).

https://sprinter-source.com/forum/showthread.php?t=62010&highlight=westy
 
If I ever make it back east I would love to stop by Dr. A's for a glow plug and relay update. I have had a glow plug related dash light come on for most of the 9 years or so I have owned my 06.

It always goes out after a few starts, so is not a big concern in my area. My van tends to sit for a couple of weeks at a time and that is when this warning light shows itself. If if drive it more, it does not light up.
 

Riptide

Active member
Ooznak, what a fantastic vehicle! Very innovative layout (one of the best I’ve seen) maximizing the use of the high roof. And the execution looks top notch.

I agree with Robert; I would love a Iglhaut drivetrain...
 
ooznak: Thanks for posting that link. I really like a lot of things about that interior.

OldWest: Thanks for the reminder about Dr. A.

I used my now empty van today to take a load of demo debris and general household trash to the transfer station. This enabled me to get an empty weight and compare it to a weight ticket that I had gotten five years ago shortly after purchasing the van. Both times the van was full of liquids. Today that would be just fuel, but five years ago it was fuel, water and LP.

Loaded as a Westfalia five years ago, I weighed 7,680 lbs, today as an empty cargo van I weighed 5,360 lbs....2,320 lbs of components and fittings to make the Westfalia. One of my design goals is to end up with a lighter vehicle.


Last edited:

MrTomacco

Mr. Tommaco
I cut the nozzle on the Sikaflex 221 Polyurethane Sealant/Adhesive to match the gap. Then I slowly pushed the caulk into the joint. Slowly pushing the caulk ahead of the nozzle, instead of pulling the caulk behind the nozzle, has the advantage of ensuring the gap is completely filled with consolidated caulk. If you push just the right quantity of caulk to maintain a small "bow wave" ahead of the nozzle you end up with the surface of the joint being nicely convex with minimal excess to strike off. Once the gap was filled all the way around the window, I used a latex gloved finger sprayed with denatured alcohol for a final consolidation of the caulk. I then removed the tape and have what to my eye is an aesthetically pleasing caulk joint that will hopefully last a decade or more. Time will tell.
I found a cheap air powered caulking gun used with a pressure regulator can provide a smooth continuous delivery of caulk without the varying output with each trigger pull of a manual caulking gun. They also stop deliver immediately when you release the trigger and it bleeds off the air pressure, not continuing to ooze like a manual gun. Great looking job!
 

MrTomacco

Mr. Tommaco
If I ever make it back east I would love to stop by Dr. A's for a glow plug and relay update. I have had a glow plug related dash light come on for most of the 9 years or so I have owned my 06.

It always goes out after a few starts, so is not a big concern in my area. My van tends to sit for a couple of weeks at a time and that is when this warning light shows itself. If if drive it more, it does not light up.
I believe if the error doesn't reoccur it resets after 3 starts. I had one bad glow plug and heard about problems with removal and special tools etc. Had the local Freightliner guys pull all 5 and installed new with lots of anti-seize. Not cheap, but done. I have met users that had no idea what the little light bulb icon on the dash was and NEVER preheated the glow plugs, just fired it up like a gas engine with no seeming problems.
 
A DIY van conversion takes a whole lot of time. My intention is to get at least something, no matter how small, done each day. That might be simply sketching out alternatives to the latest unresolved detail, ordering some fasteners or reading one of the many incredible build threads for inspiration.

In that vein, yesterday I finished up removing the Westfalia wiring harness from the OEM electrical center under the drivers seat. While in there, I vacuumed and wiped out fifteen years of debris, and checked to make sure that the chassis grounding stud was torqued and corrosion free.


After reinstalling the drivers seat, I reinstalled the drivers side foot well lining. Looking at the minor rust patterns and the wear on the studs molded into the underside of the foot well lining, it became apparent that the rust was caused primarily by wear from the foot well lining abrading fifteen years of debris into the metal.


I've seen others add sound deadening mat to the foot wells, which gave me the idea of putting something down to prevent further abrasion. Amazon hasn't yet achieved on demand drone delivery in my city, so I had to find something on hand. Some sticky back bubble wrap out of the recycle bin will have to do for now.


Midwestdrifter

Engineer In Residence
Neoprene rubber sheet works great in the foot well. I also suggest drilling at least one small drain hole at the front or rear. The drain gaps in the seam plug easily. The door seal can guide water into the foot well in significant quantities.
 

grozier

Active member
...2,320 lbs of components and fittings to make the Westfalia.
This has been a helpful addition to my "Westy weights" spreadsheet: https://docs.google.com/spreadsheets/d/1kfwX0FoO2v_S0BtSh2v01C4XOtub-Rjs3Tnxz4yIKoA/edit?usp=sharing

It's been very difficult to get consistent numbers on what these vans weigh.

Note you still have the fiberglass roof, which I imagine is heavier than the steel, if only by virtue of being bigger. Do you still have the awning? That is a heavy unit.

I think you will be able to make it lighter, especially if you don't have the massive structures for the second-row seat belts. That stuff is really heavy!

Ted
 

OldWest

2004 T1N Westfalia
Interesting weight numbers.

Even for a lighter new Foster version Westy, weight distribution to the front and lower would seem to improve handling.

I'd go for all underchassis fresh and graywater tanks (compost toilet so no black tank) versus the original Westy..

To be really clever, design the graywater tank as removable on wheels (or a portion of graywater tank) so can dump in any toilet (like a cassette toilet). Cold weather folks may want above floor and not rely on heating pads for tanks.

If AGM batteries, put them under the floor too.

Anything for use outdioors would be accessible from outdoors (e.g., Discus canopy tent stored on replacement rear step bumper).

If any other space under van, then storage for snow chains, tools, emergency parts, extra fluids like oil, coolant, etc.

Spare tire area has already been converted back. Otherwise, could create storage there.
 
Midwestdrifter: I thought I had some EPDM laying around by unfortunately couldn't find it. I am reluctant to drill another drain hole, with the thought that every drain hole is also an entry way for water. I've added an additional weather stripping to my doors that redirects significant water away from gaining entry, so I am thinking for now I will just monitor my foot wells and periodically check the existing drain hole from underneath.

grozier: The awning was one of the first heavy things that I removed years ago, along with the roof mounted air conditioner and under slung generator. Your right that steel structure inside of the kitchen cabinet was very, very heavy-way overkill in my opinion. The other item that was/is unusually heavy is the plywood sections that make up the upper berth platform.

OldWest: My weight distribution will definitely be more forward than the original Westy, as nothing of heavy weight will be behind the rear axle, but my components are all going in my "basement" instead of underneath. That said, there are those two areas along the frame where the original LP tank and Epar used to reside that intrigue me as very useful for something.
 

Top Bottom