2004 T1N Mountain Bike Van Build

alexk243

KulAdventure
Love your build. I think I read all the posts! Seems like you’ve had some fun adventures.

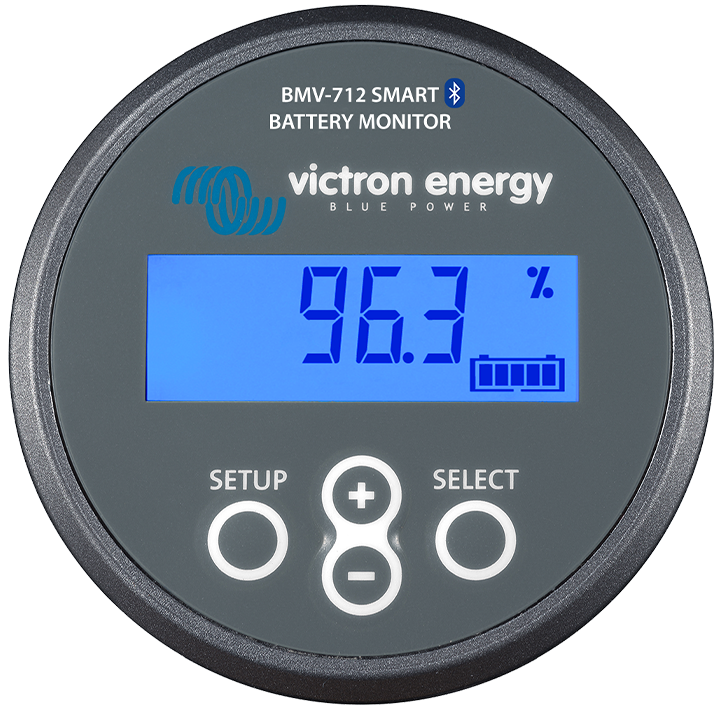
What is the little screen/monitor in post #89? I like it, and would like something that measures amps too!
Thanks! The build was designed to be more functional that luxury and it's been constantly in use since I got it, really don't think the build will ever be "complete" haha but that is totally fine with me, its been awesome to travel in since day 1.

That screen is a voltage/ammeter (https://amzn.to/2L2iQ7u) that is hooked into a shunt on the negative terminal of the house battery. Didn't realize at first that a shunt can only read flow in one direction, so I connected it to read draw instead of charge, which works out fine for my use and to tell how much power I am drawing from the battery. So if the amperage shows 0 amps I am most likely in a charge state (either alternator or solar). There are more pictures in this write-up too.
 

Midwestdrifter

Engineer In Residence
Shunts don't care what direction the current is in, that only changes the sign of the voltage drop (plus/minus) Your meter is the limiting factor, as it only supports reading one voltage (positive) as opposed to positive and negative voltage. You could even add a DPDT switch to invert the meter if you needed to read charge current. Though it might slightly impact the accuracy.
 

alexk243

KulAdventure
Shunts don't care what direction the current is in, that only changes the sign of the voltage drop (plus/minus) Your meter is the limiting factor, as it only supports reading one voltage (positive) as opposed to positive and negative voltage. You could even add a DPDT switch to invert the meter if you needed to read charge current. Though it might slightly impact the accuracy.
Ah, good to know. I found it odd that it only displayed draw and not charge. I don't really need to know the charge, would be cool to see, but not terrible important. Do they make ammeters that show both draw and charge (positive/negative) utilizing a shunt?
 

Midwestdrifter

Engineer In Residence
Ah, good to know. I found it odd that it only displayed draw and not charge. I don't really need to know the charge, would be cool to see, but not terrible important. Do they make ammeters that show both draw and charge (positive/negative) utilizing a shunt?
Sure, plenty of options. You could even go with an integrating monitor. These sum the current over time (mathematical integration) to give you an estimate of the battery SOC.

Here is a nicer basic ammeter.

Here is a battery monitor. So voltage, current SOC, days since full, etc. Some models have bluetooth for easy viewing on a mobile device.


alexk243

KulAdventure
Finally fixed my parking brake/emergency brake. Has never worked since I have owned the van, probably due to the seized/rusted up mechanism under the van. Was able to fix it without replacing any parts. Just ground off all the rust, painted it and greased it up. As long as I keep an eye on it I think it will be fine. Did a full write up on the process here. EuropartSD sells the pieces for $75 but I think it can be fixed pretty easily unless its really really rusted. I did it while I was replacing my rear brake rotors and pads. I also replaced the shoes and all the hardware and ran into some issues I posted about here: https://sprinter-source.com/forums/index.php?threads/84335/

IMG_20200511_141233.jpg

IMG_20200516_130128.jpg

IMG_20200511_150716.jpg
 

Midwestdrifter

Engineer In Residence

alexk243

KulAdventure
Thank you all. I know I haven't update anything lately, but I have been doing a bit of work on the van and I just need to take some more pictures of the interior build. Ill try and get this updated soon, just been on the road in the van a lot lately.

Thanks for the work, my bike build is moving ahead.
Do you have any write-up or links to pictures of your build? Would love to see it.

Also ended up getting a new transmission for the van on my last road trip, really expensive. Looks like it was caused by a leak at a rear seal and running out of trans fluid. I had a different thread on the transmission issue and fix which you can find here if you are interested.

This is the first fill up of ATF fluid after the brake down (limping into the shop... 150 miles):
IMG_0454.jpg

I do have a large enclosed 7'x12' trailer that I tow now behind the van for hauling motorcycle, dirt bikes, and mountain bikes:
IMG_20200607_171856.jpg

And a river crossing near Keystone, CO (had the trailer off to make it up to camp, left it at the trail head):
DSC08514.jpg
 

IPT

Active member
Just stumbled onto you thread. That bike rack looks interesting. Ultimately we will have 4 bikes and want to maintain easy access to the rear doors to access supplies etc. A bonus would be access to a door ladder if we do a roof rack. Looks like you have the ladder and 4+ bikes. Are you still using this rack and do you have any comments about it after using it a while?
 

alexk243

KulAdventure
Just stumbled onto you thread. That bike rack looks interesting. Ultimately we will have 4 bikes and want to maintain easy access to the rear doors to access supplies etc. A bonus would be access to a door ladder if we do a roof rack. Looks like you have the ladder and 4+ bikes. Are you still using this rack and do you have any comments about it after using it a while?
I am still using it. I love it except for it's weight, especially with 4+ bikes on it. You really have to get in a good position to lower and raise it to access the back door, but I much prefer it to other racks I have in terms of ease of loading and unloading bikes. On long trips I am bringing 4+ bikes and it really excels at that. I am debating getting a second two bike rack for short trips around where I live though. Due to its weight and where I have to store it I find that I don't want to hook it up for just a day trip, that being said if you can store it closer to where your van is kept that may not be an issue. I actually did a full review with a lot more pictures of its clearance from the back door and ladder on my website which you can see here. It does clear the ladder and doors when in the 3rd position and allows you to open the door about 80% (could be 100% with modifications to rack) when in the fully down position and bikes still on it. The three positions on it are: angled forward (pick up truck), vertical (SUV/Cars), and angled back (vans with ladders lol). All that being said I would defiantly buy it again even with all the other racks on the market now.
 
  • Thanks
Reactions: IPT

tsullaway

New member
MaxxFan

I am going to apologize now for the lack of pictures in the beginning stages of this project. As the project went on I took much more pictures.

For the MaxxFan installation I followed information from others on this site. It was a bit of a hassle to deal with the ribs (I didn't take any pictures of this process). I used the method of cutting out the square (angle grinder with 4.5" cut off disc) and then cutting a slot in the rib so the rib went above the plastic mounting plate. I made sure to use a lot of the butyl rubber tape to place the plastic mounting plate on and once secure on I used a lot of Self-Leveling lap sealer to seal it all up. The I linked to is the same brand, but I had to hunt down some black lap sealant to match my vehicle, which cost a bit more, but I thought white sealant would look odd on my roof. Wiring to the MaxxFan was pretty easy since its controlled by a wireless remote. Installation was pretty easy and required a little bit on sanding/grinding to get it to fit perfect.

The fan has been in there for a few years now with no leaks. Wasn't sure about the part with the rib as there was a little bit of a gap, but the combination of HVAC foil tape, butyl tape, and lap sealer it has seemed to hold up.

This pictures are taken a lot later in my project, but show the location of the fan and how I dealt with the ribs:

Also note that I used machine bolts and nuts on the corners for added strength and the sheet metal screws on the sides:


Did you Remove the Roof AC system?
If so how was that?
Thinking about doing so on my 2004.
 

alexk243

KulAdventure
Did you Remove the Roof AC system?
If so how was that?
Thinking about doing so on my 2004.
I did not, it was removed, mostly, when I bought the van. The top exterior A/C parts were removed and plugged, but the lines, electrical, compressor, interior fan/evap core and switched remained. I removed those all except for a few A/C lines and the compressor. Although the compressor is no longer attached to the harmonic balancer and I now have a single belt harmonic balancer.

Is your rear A/C system still working? If not, is the secondary compressor still hooked up to a dual-belt harmonic balancer?
 

tsullaway

New member
I did not, it was removed, mostly, when I bought the van. The top exterior A/C parts were removed and plugged, but the lines, electrical, compressor, interior fan/evap core and switched remained. I removed those all except for a few A/C lines and the compressor. Although the compressor is no longer attached to the harmonic balancer and I now have a single belt harmonic balancer.

Is your rear A/C system still working? If not, is the secondary compressor still hooked up to a dual-belt harmonic balancer?

Everything is intact and working, just wondering how invasive it would be to remove the whole system.
 

alexk243

KulAdventure
Everything is intact and working, just wondering how invasive it would be to remove the whole system.
Its not that bad to remove most of it, but if its all working and fine why remove it? It does not take up much interior space or roof space.

If you decide to remove it, just make sure you safely drain out the refrigerant before working on it, preferably into a recovery tank. Then the hard parts would probably removing the roof top unit and sealing up the holes (my rooftop part was already removed). You can leave the lines underneath the van... they are really not in the way of anything, but easy to cut out once drained, then just remove the belt between aux A/C compressor and the harmonic balancer. If you are really trying to be preventative in mainainence I would replace the harmonic balancer with a single belt one, as they are prone to failure (my own experience).

Also something to note, if you plan to do a rear battery/build the electrical line that ran to rear evap core/fan/rooftop A/C is a large gauge wire coming from the battery (aux fuse box on battery... 100a fuse I think... or similar) and can by utilized as a power line from the engine battery for other high demands.
 

tsullaway

New member
Thank you for taking the time to reply and all of the info!! Maybe I will just leave it. I wanted to put a roof rack/platform up top and build out the inside. Perhaps I will just build around the AC unit.
 

alexk243

KulAdventure
Thank you for taking the time to reply and all of the info!! Maybe I will just leave it. I wanted to put a roof rack/platform up top and build out the inside. Perhaps I will just build around the AC unit.
Yeah I would not have removed mine if it was still fully functional, that being said I have found that it would not have been really needed while driving (front A/C in an insulated van seems to be plenty) and if you are planning a build where you may remove it in the future it could effect your layout (internally and on the roof).
 

alexk243

KulAdventure
Following...just bought a 2005 myself and you're definitely providing quality guidance for my build. Thanks!
Thank you! It's been a while since I posted, just been busy with other stuff. I'm going to take a bunch of pictures and update this also. I have done a ton more to the interior, but it feels like my focus lately has been mechanical issues. Either way the van is still awesome and chugging along and has been awesome.

Cannot stress enough how awesome it was to build my rear bed to fold up and away so the van can still be used as a cargo van. Been using it a lot lately when doing work on my house picking up 4x8 sheets of plywood and cement board as well as heavy cement and tiles.
 
Last edited:

Top Bottom