2004 T1N Mountain Bike Van Build

alexk243

KulAdventure
I have read so many write ups on this forum and received so much help so far from others on this forum that I felt I needed to do a write up to help anyone else in the process. Van was purchased in 2016 and I am just getting around to a write-up on the camper build, which is still ongoing (and I assume it will never end haha).

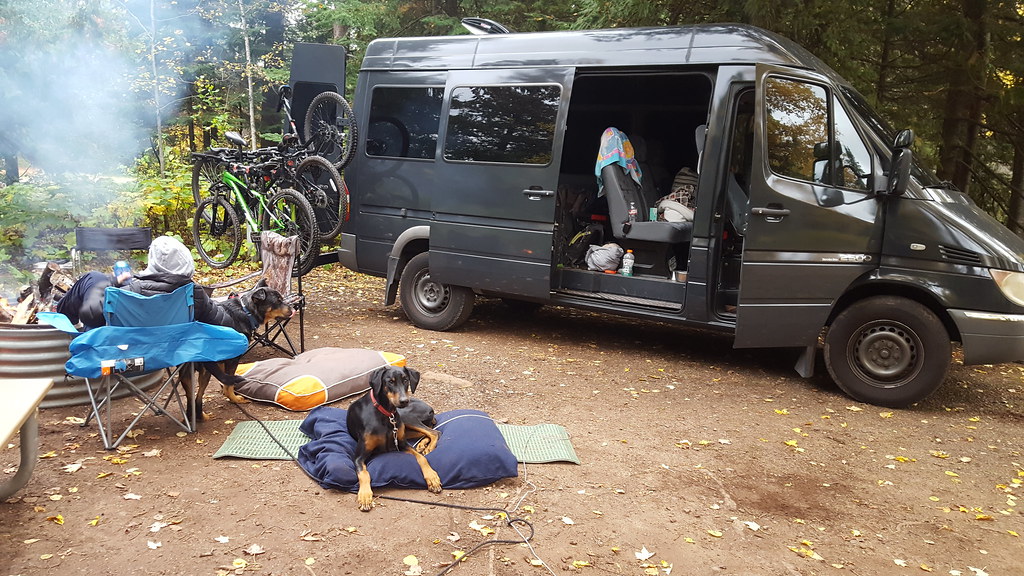
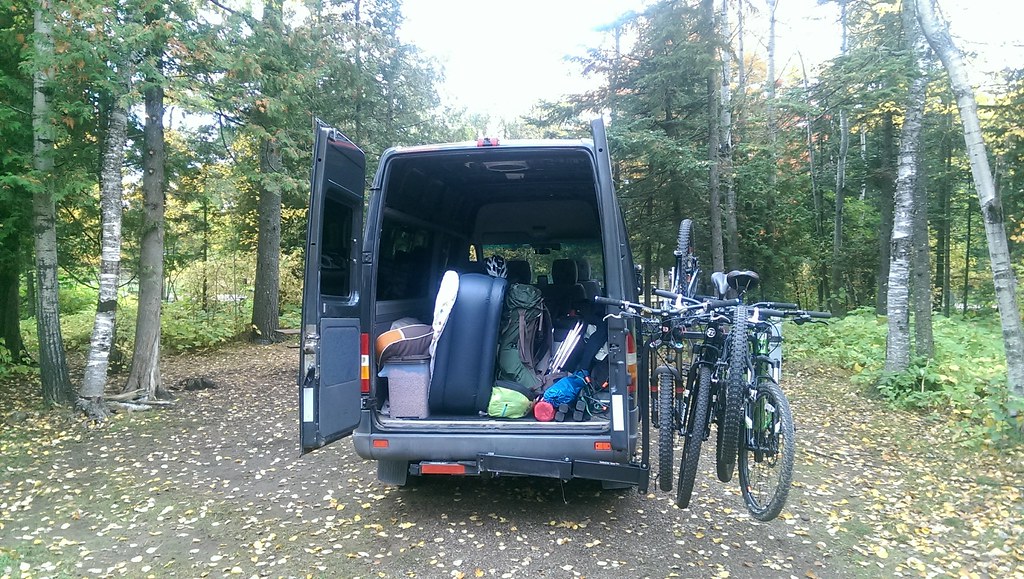
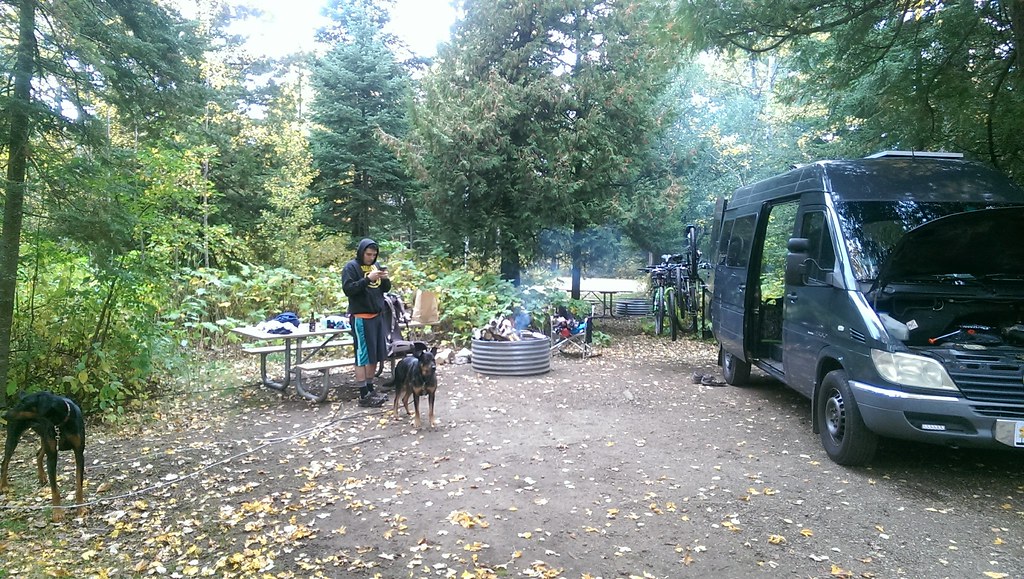
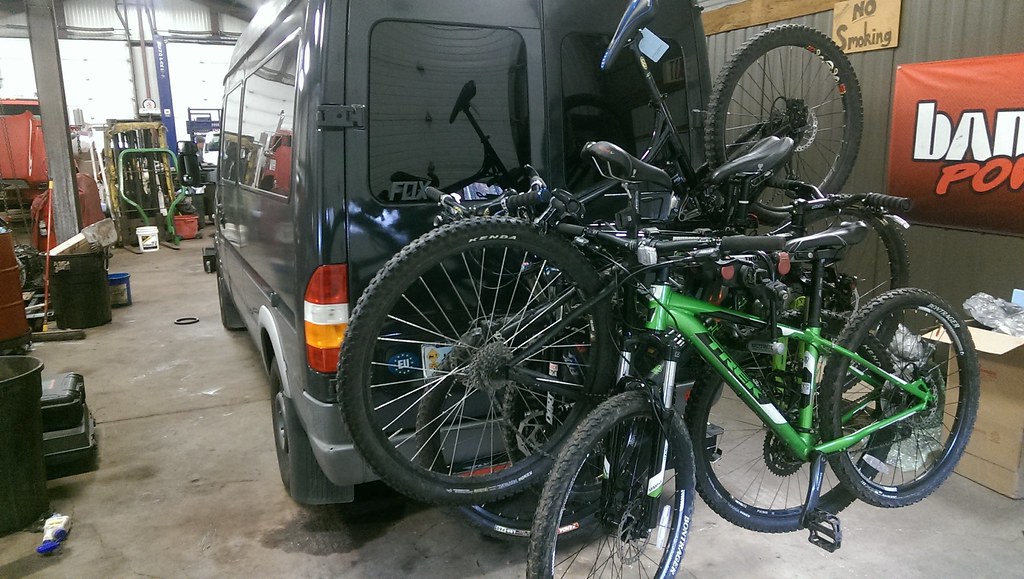
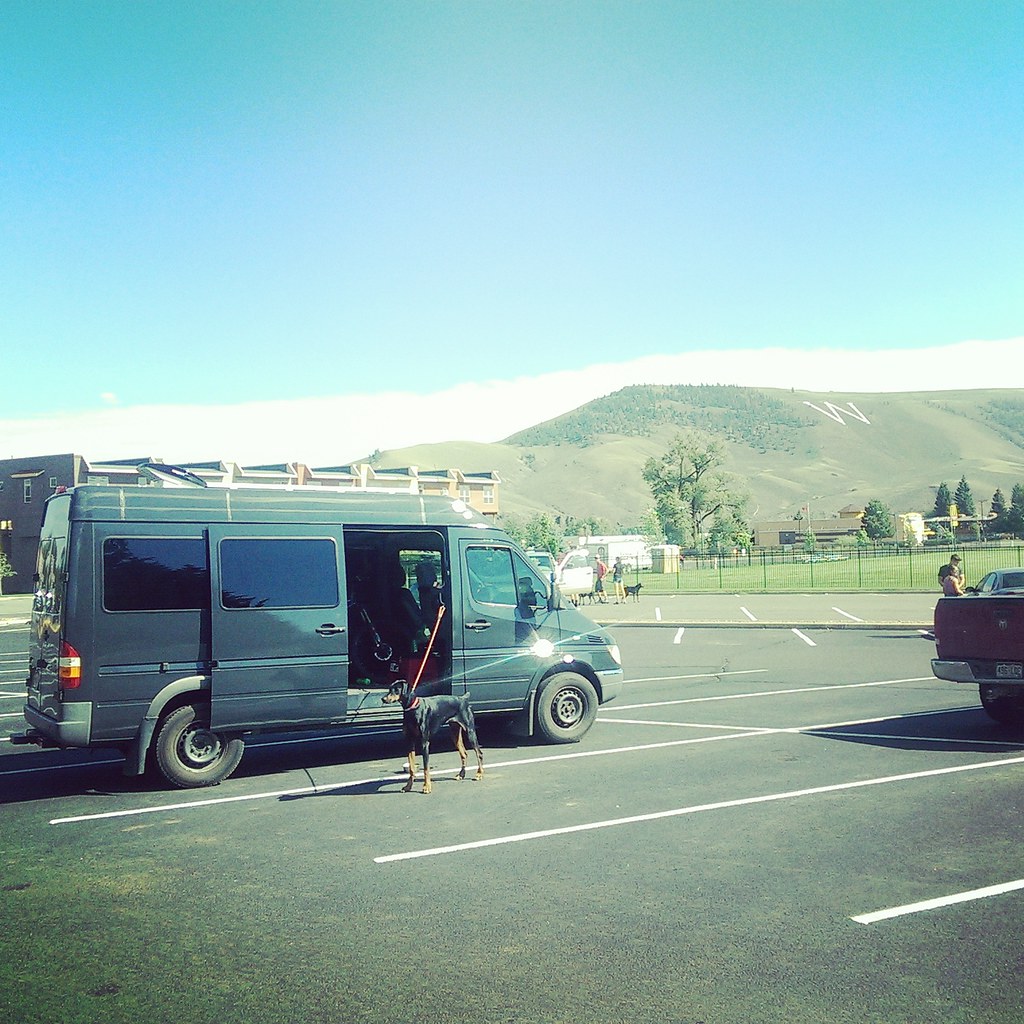
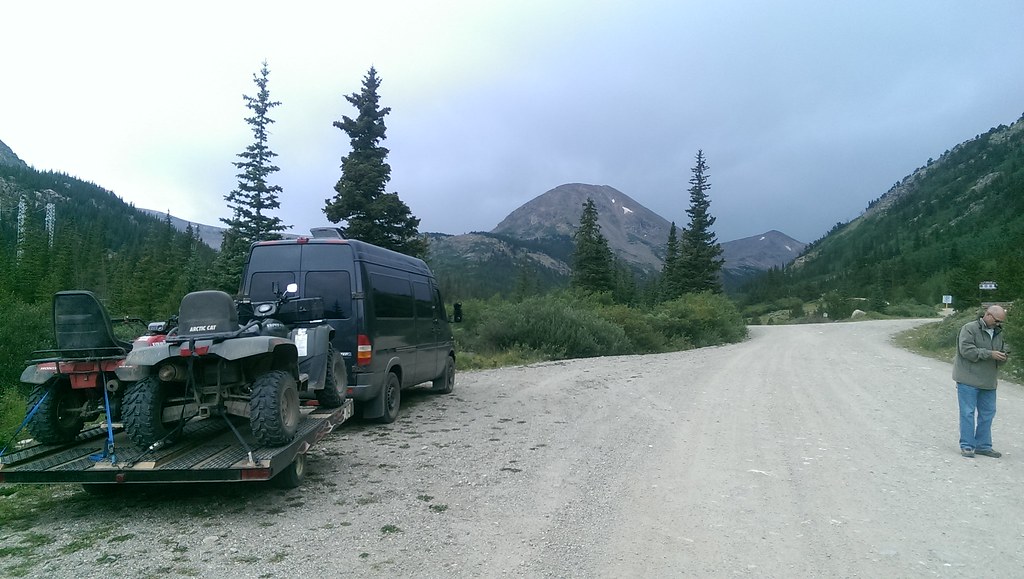
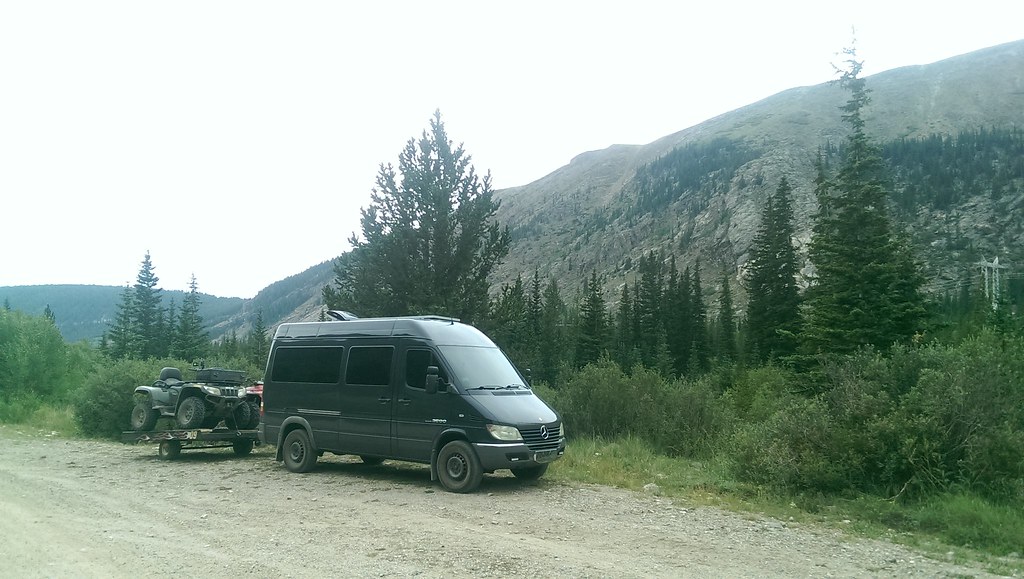
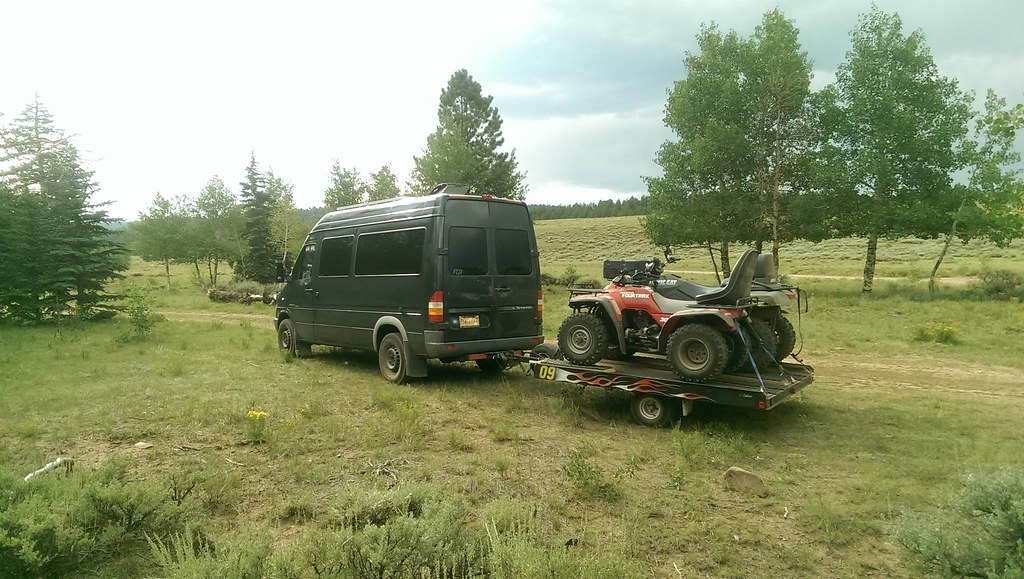
My goal was to make a camper van for the long road trips to go mountain biking and other outdoor adventures. Had to fit me, the dog and possibly a few friends. Had to get decent gas mileage and haul my bikes/equipment.

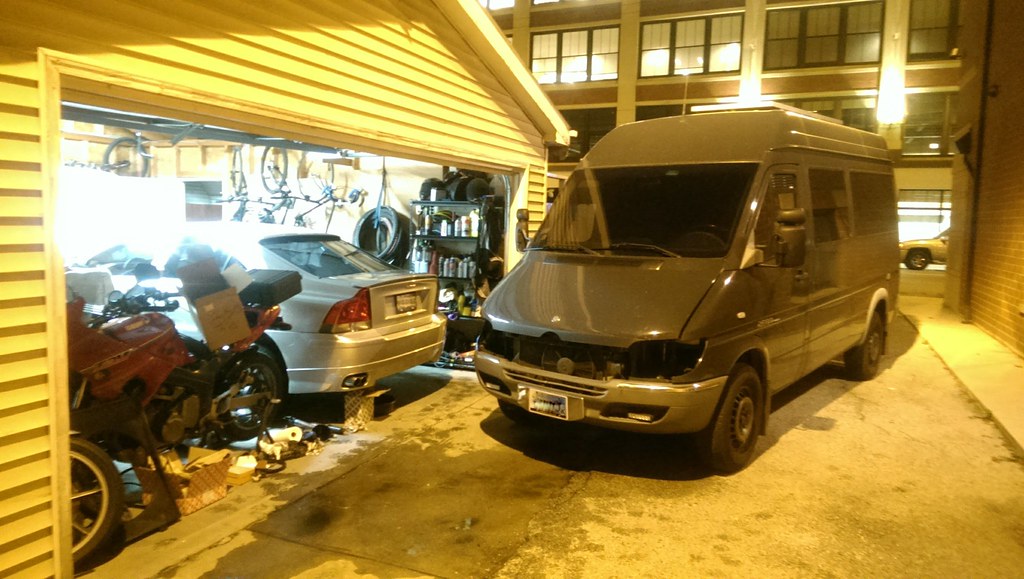
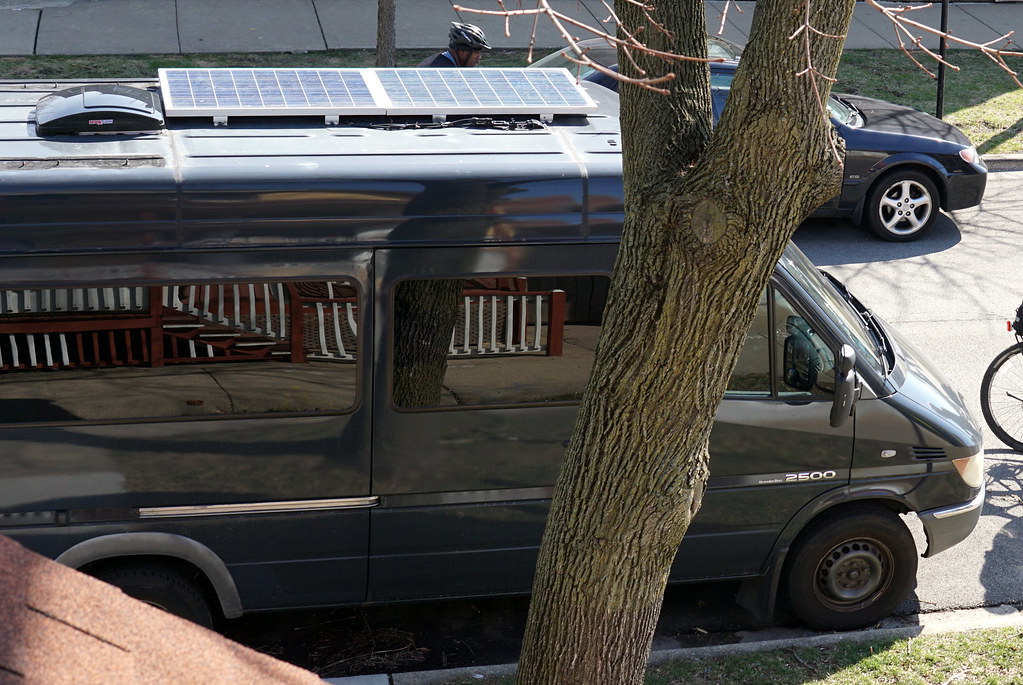
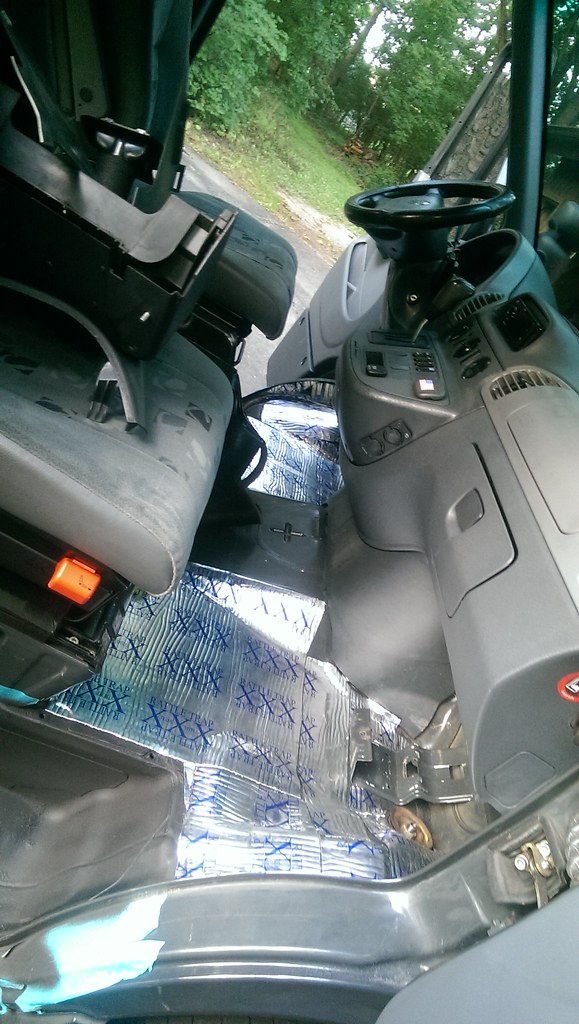
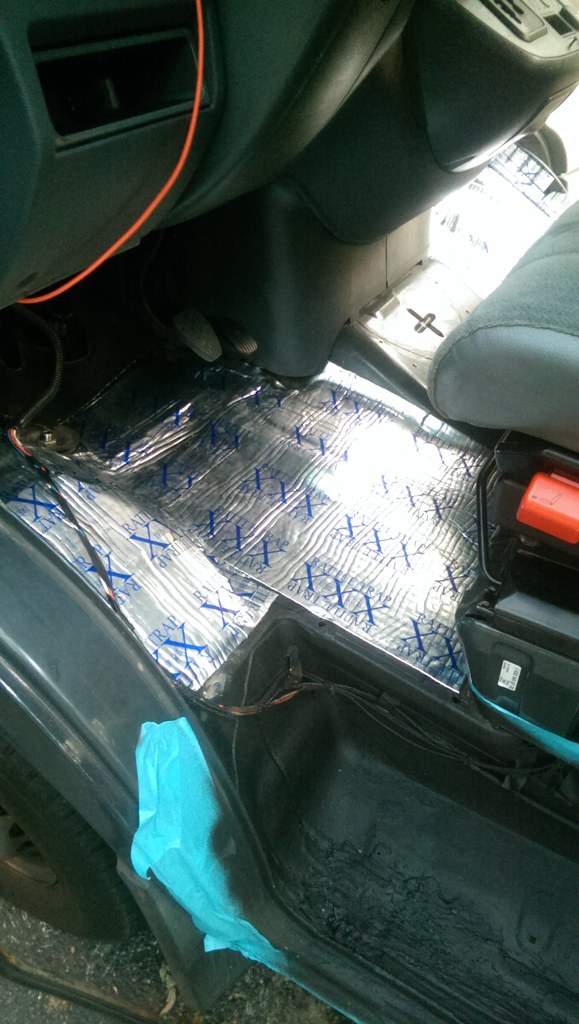
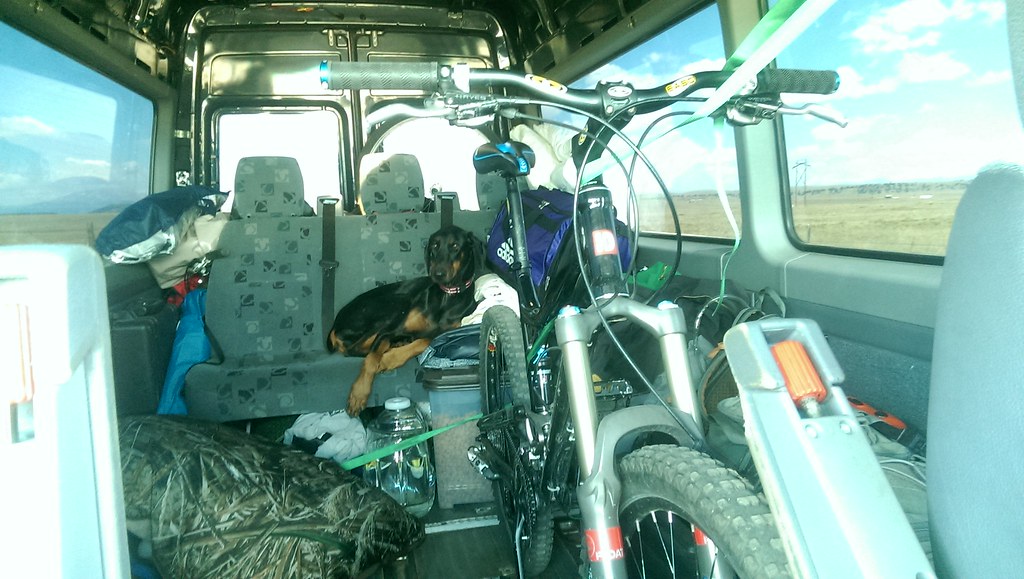
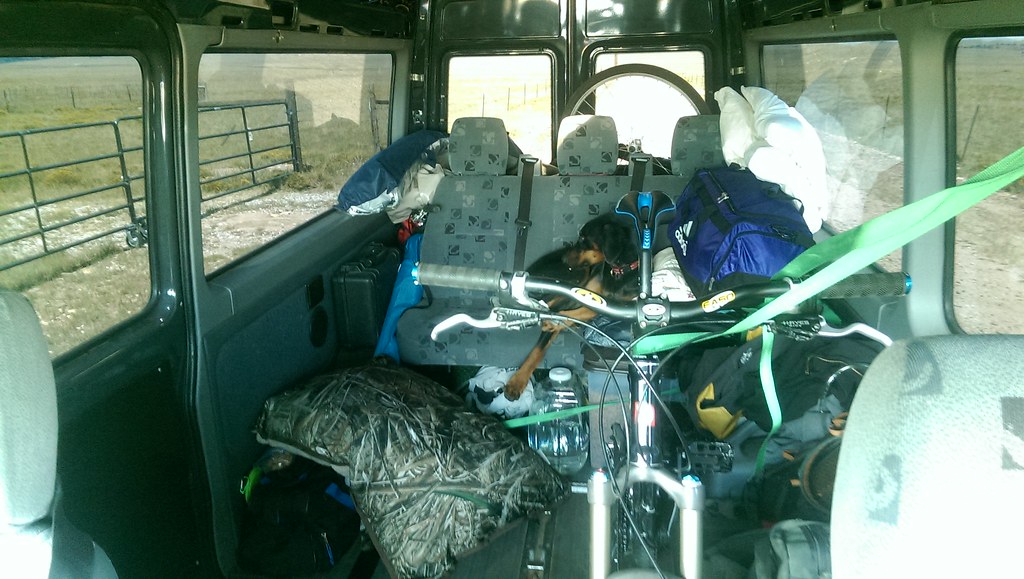
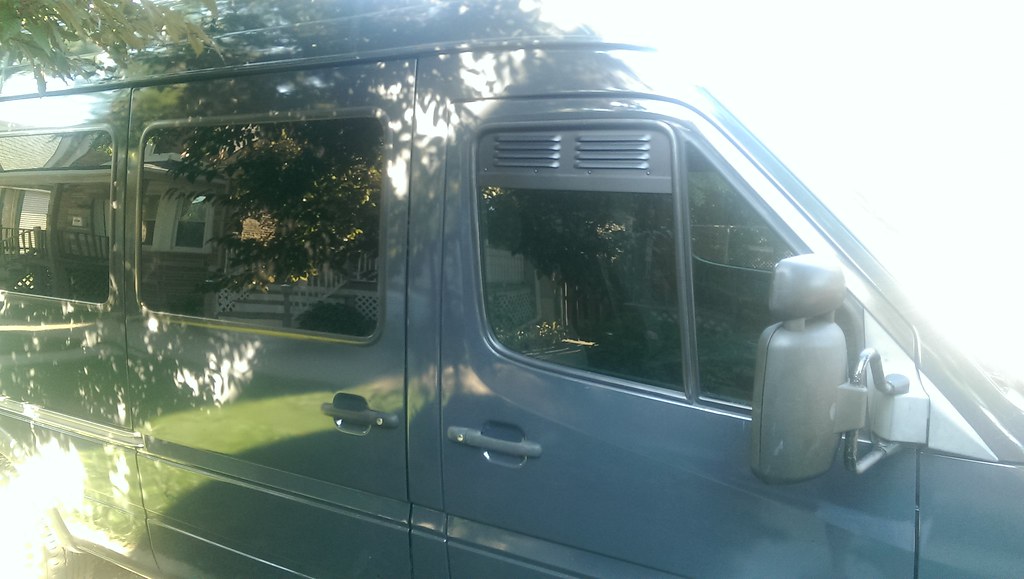
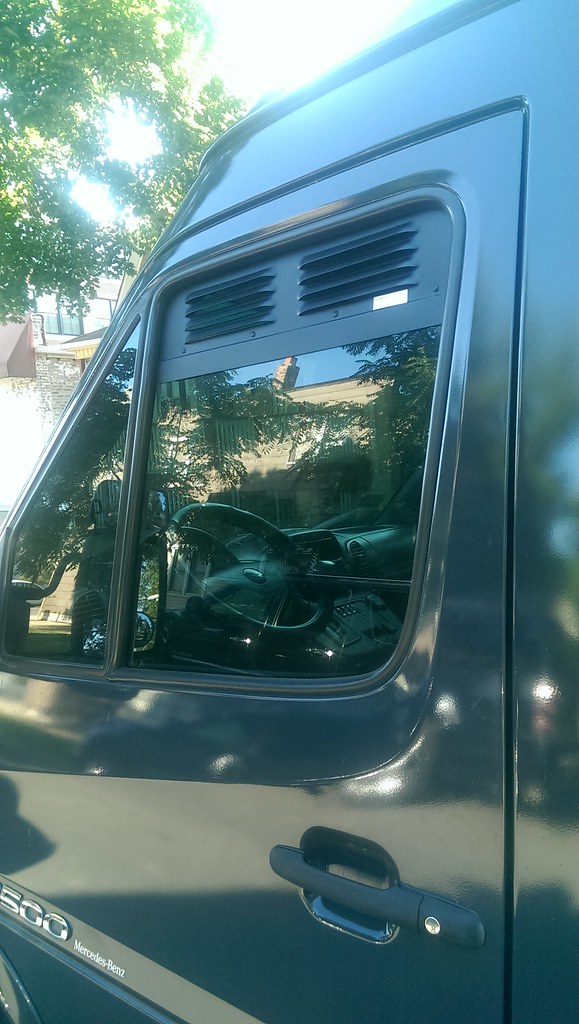
I shopped Sprinters for a while, tossing up T1N vs NCV3. Ended up getting a 2004 Dodge Sprinter 140 Wheelbase High roof passenger van. The van was used by a family before I bought it and had previously been a transport van (highway use) with a wheelchair lift. Van had over 230000 miles on it, but from what I had read that really didn't concern me. The rear A/C had been removed and the wheelchair lift no longer existed, but there was still 3 rows of seats and the duct work for the rear A/C.

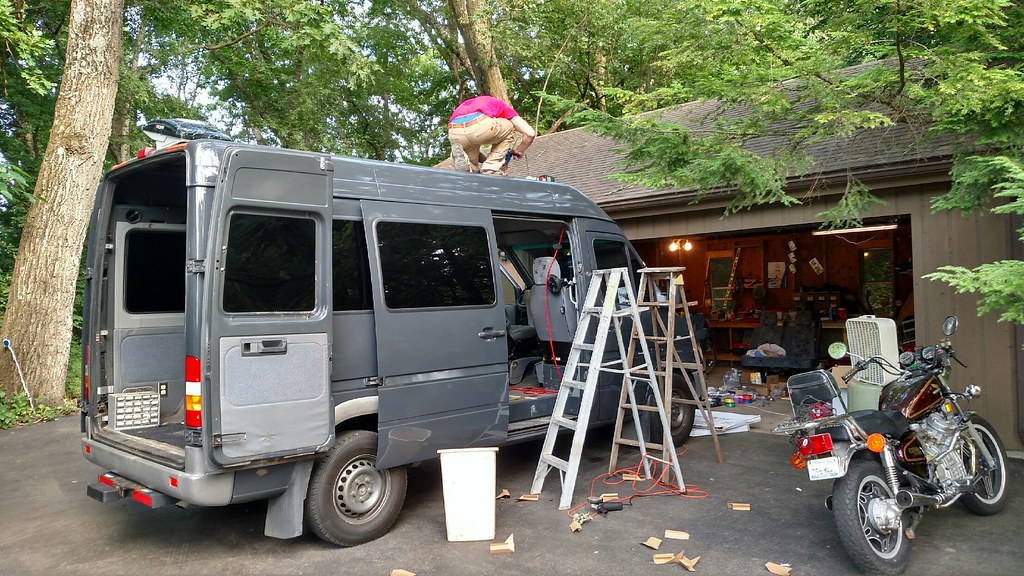
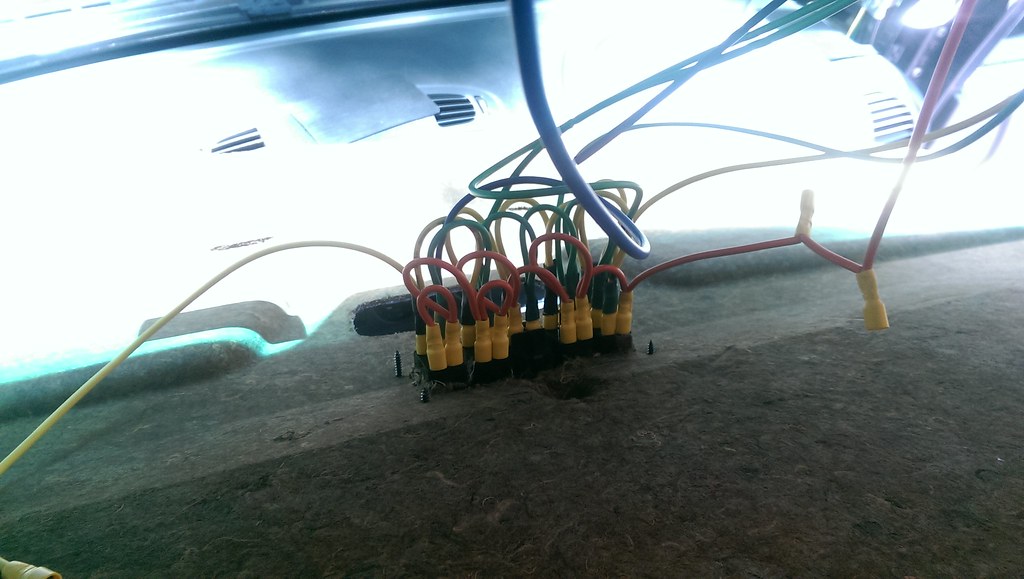
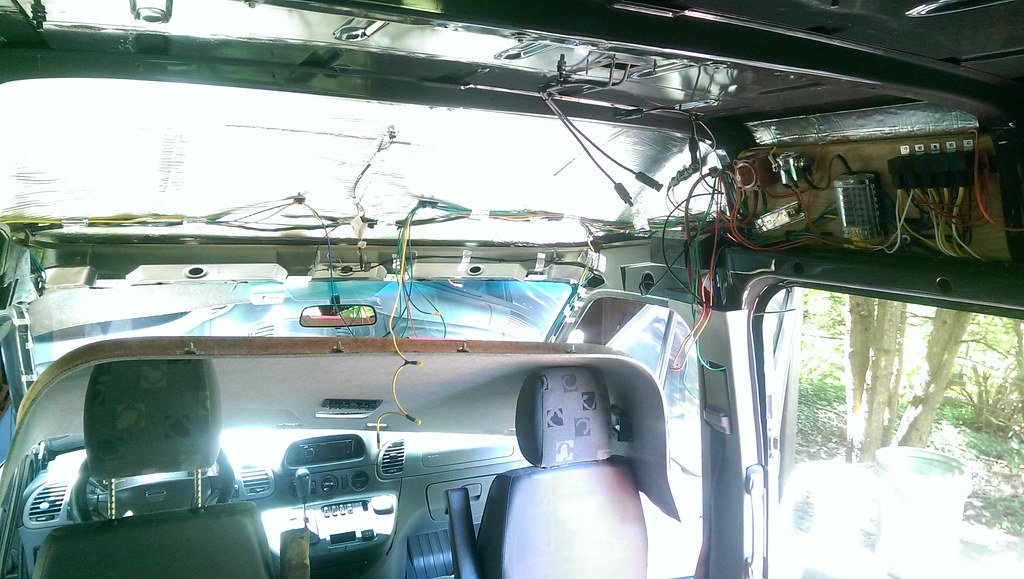
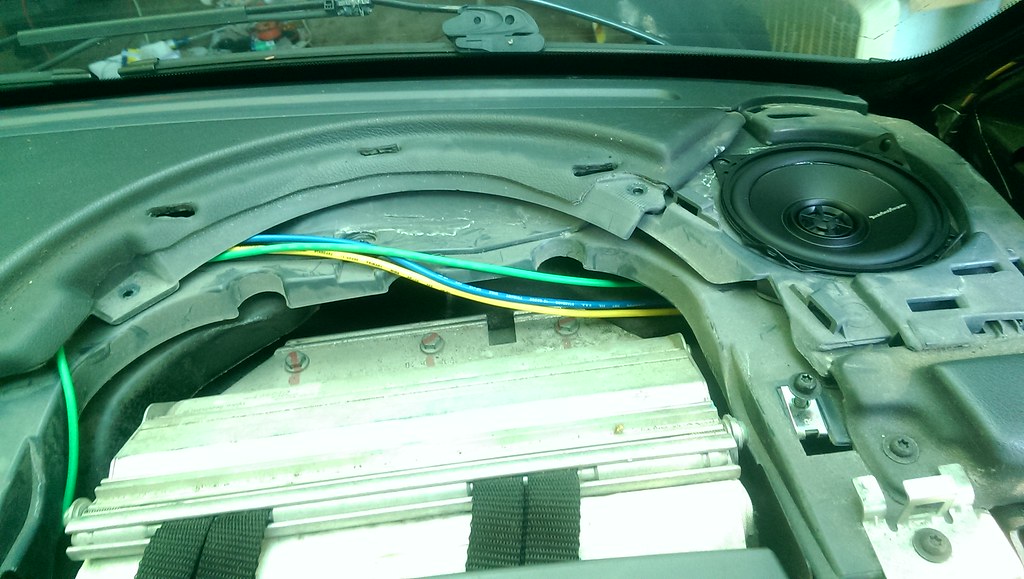
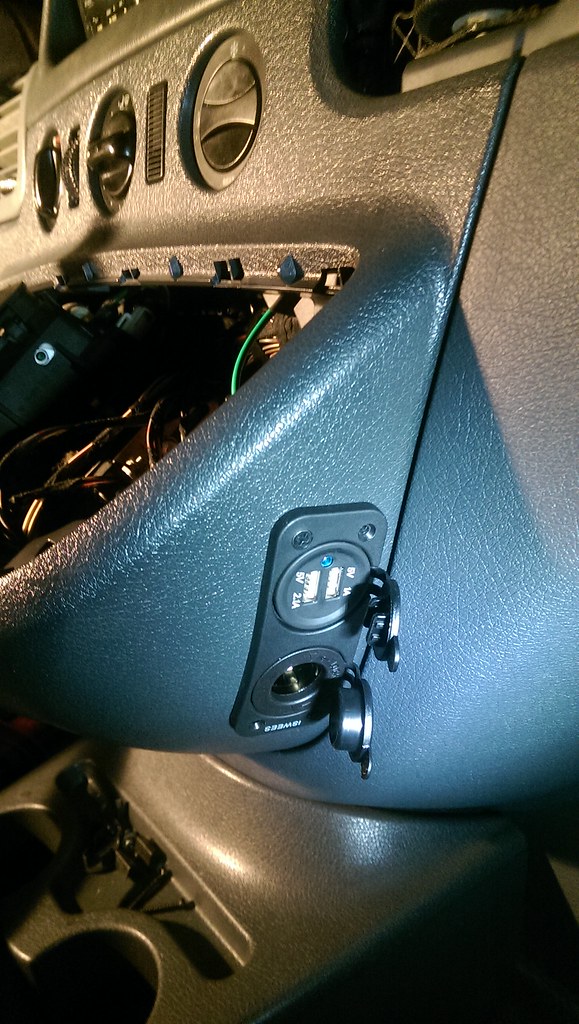
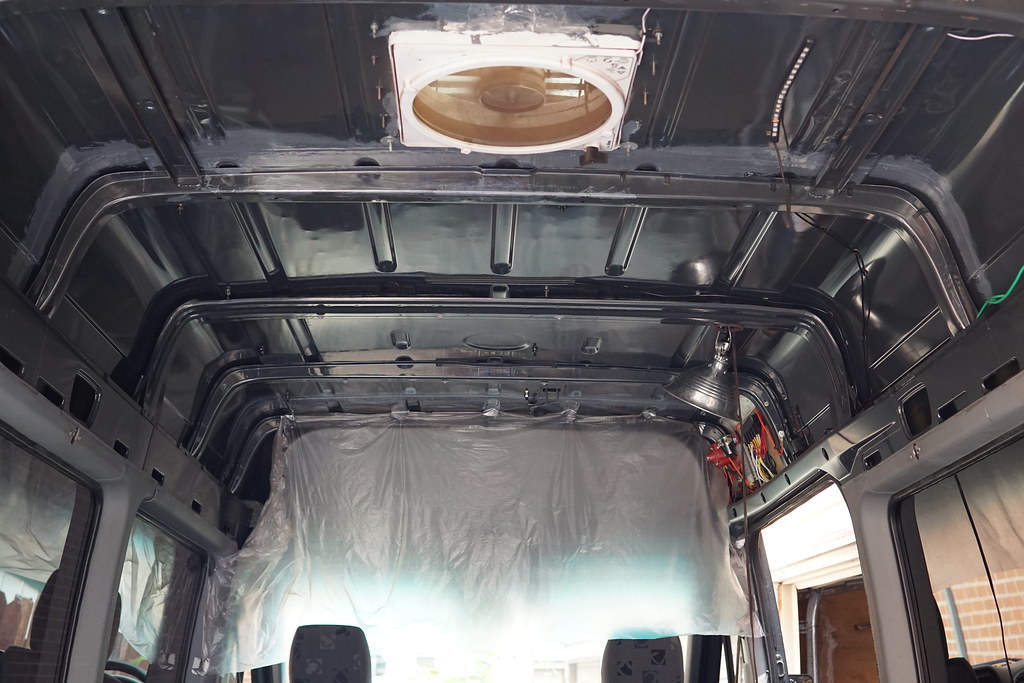
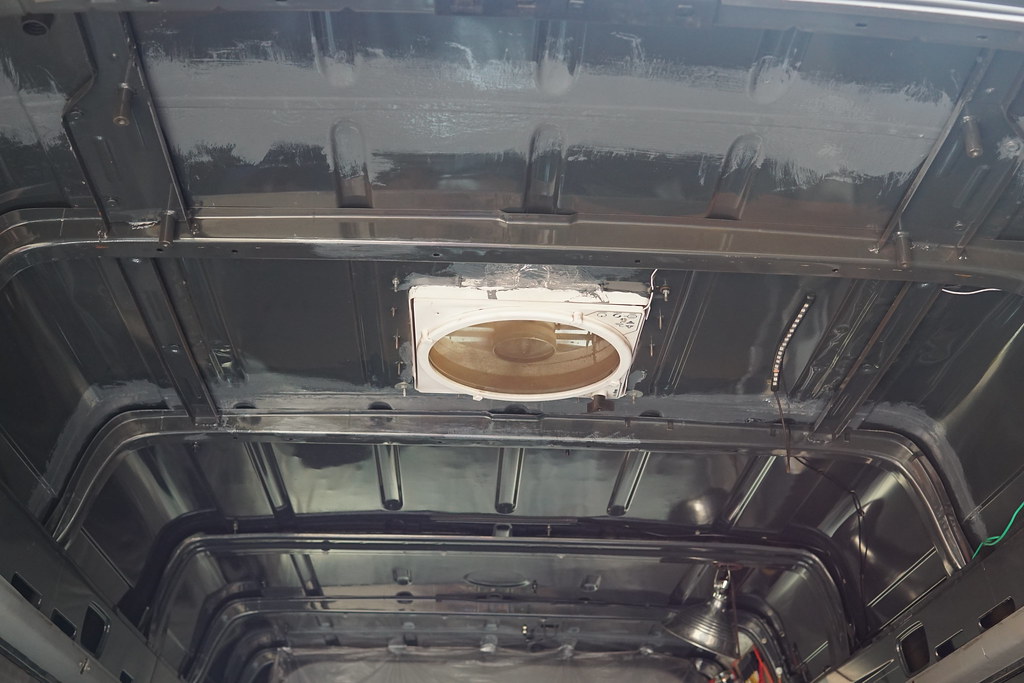
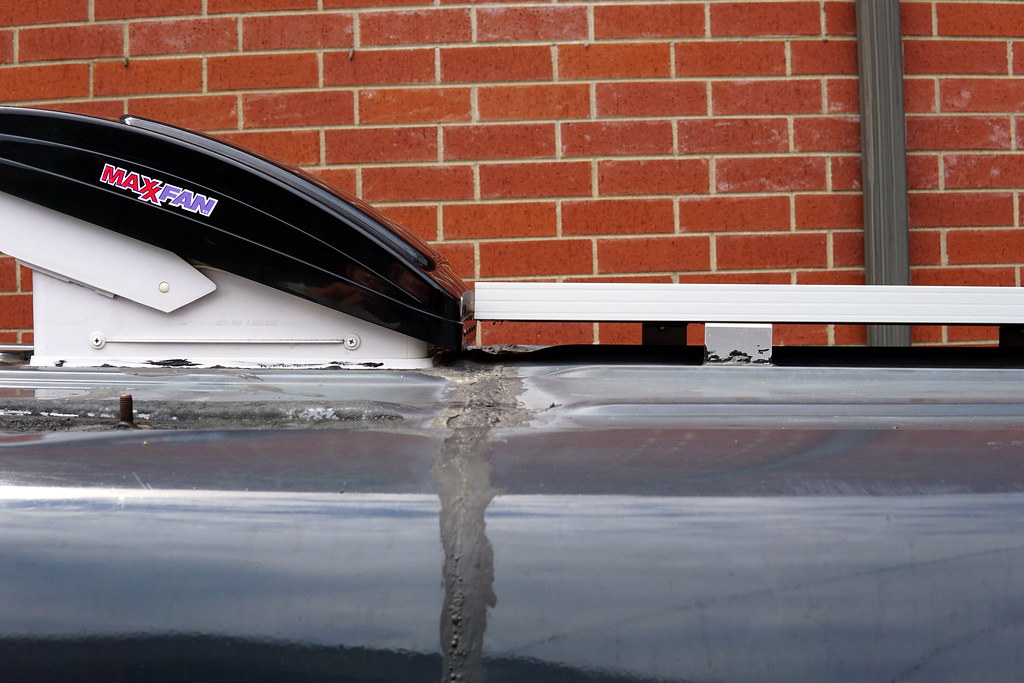
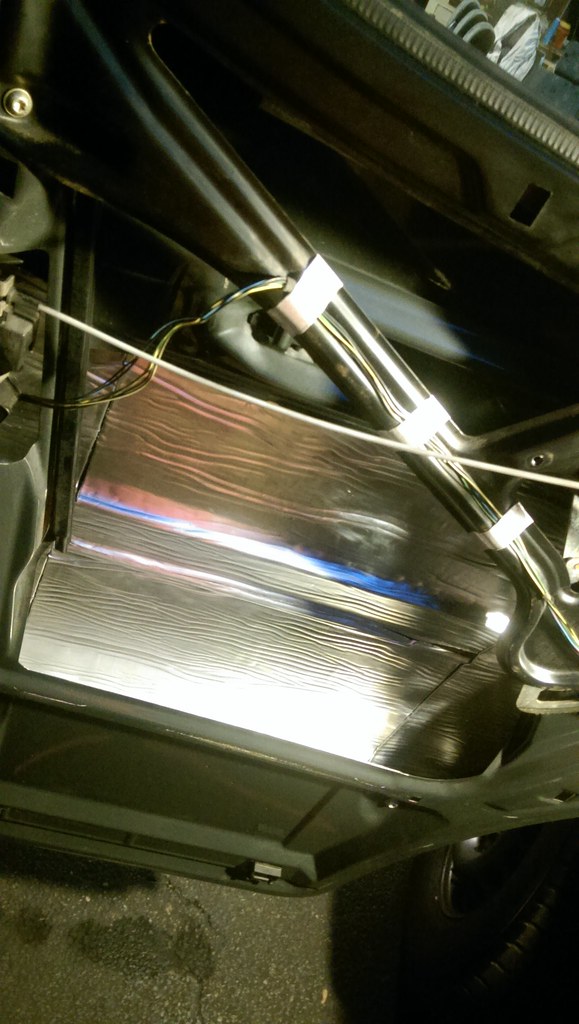
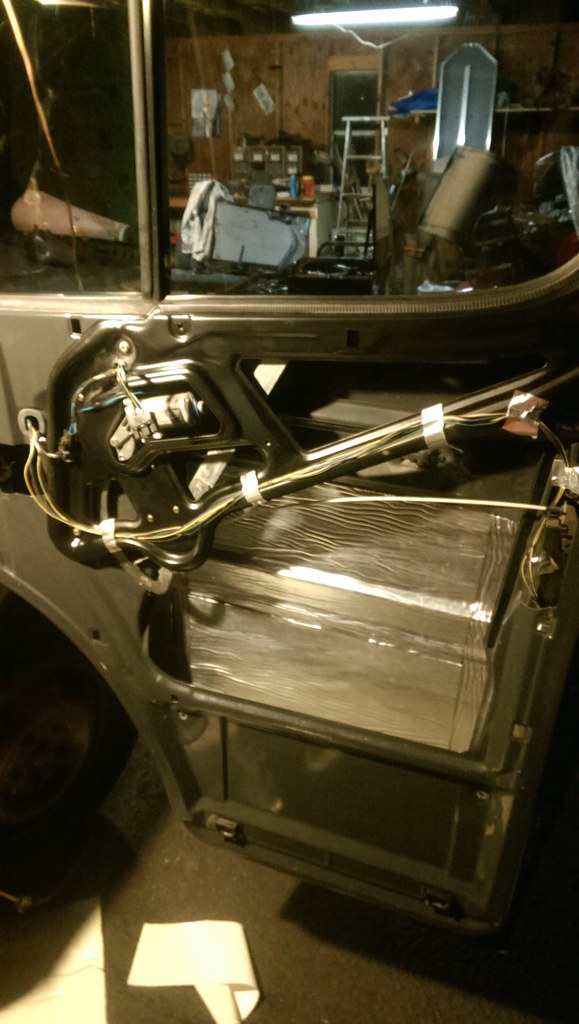
Without knowing the game plan yet, I wanted to work on the electronics. I knew I would at least need one battery and wanted solar. It would be much easier to do electrical before insulation and interior was built. Also a MaxxFan was essential for airflow so I jumped right into those. I picked one with a smoke cover, although slightly more expensive I thought it matched the black color of my van better when closed. I also paid up for the one with the remote, which is really essential if you are driving by yourself.


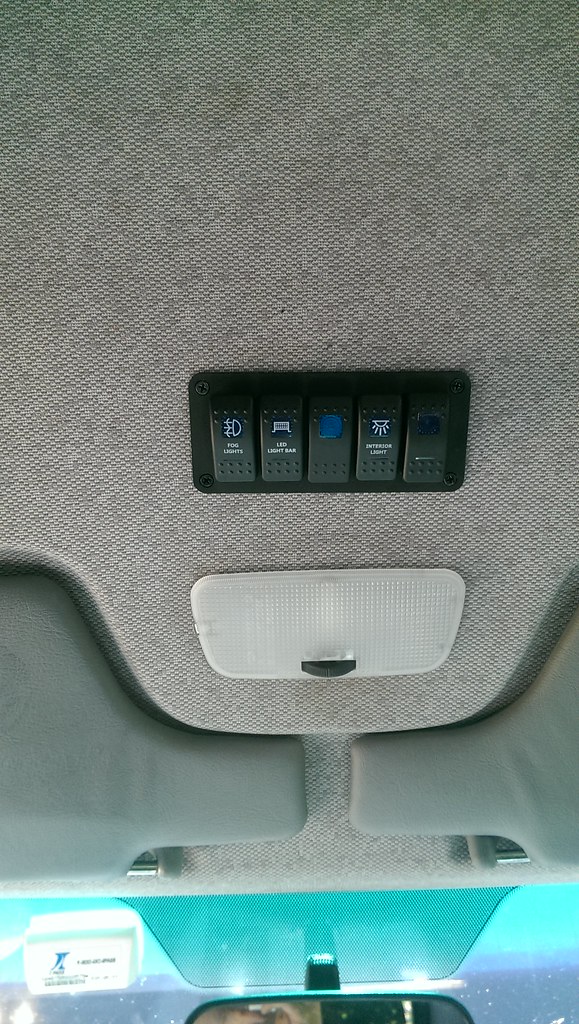
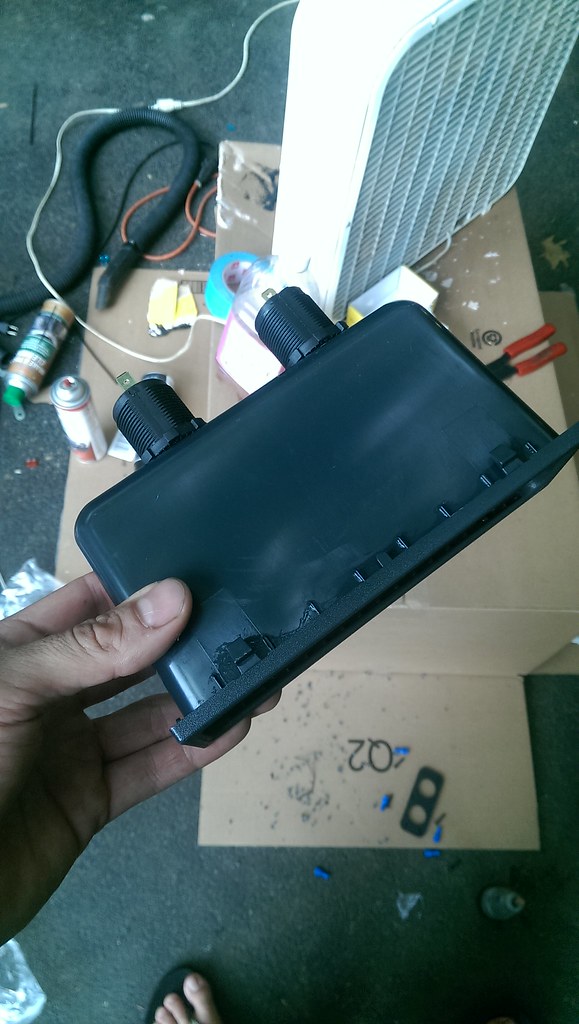
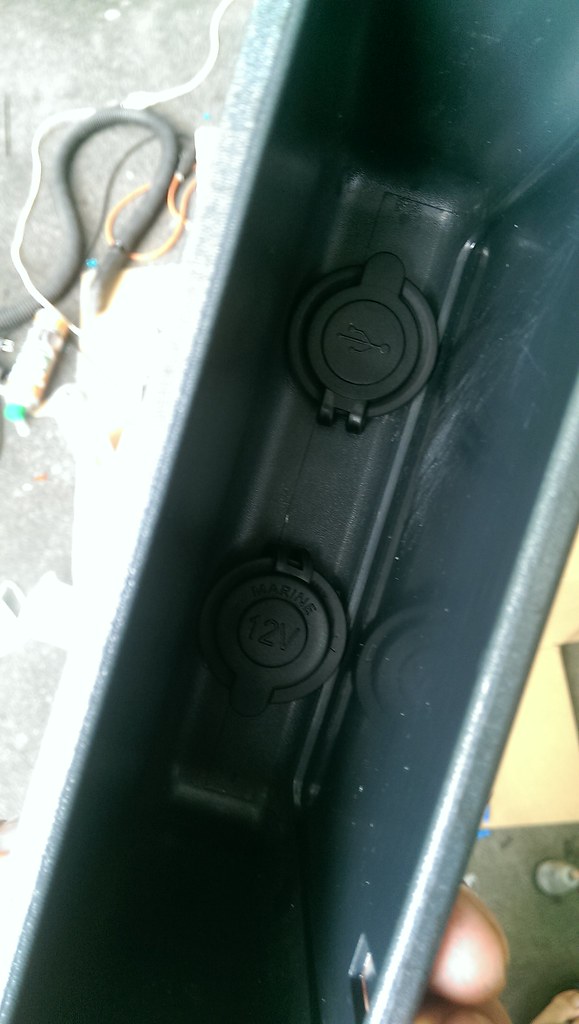
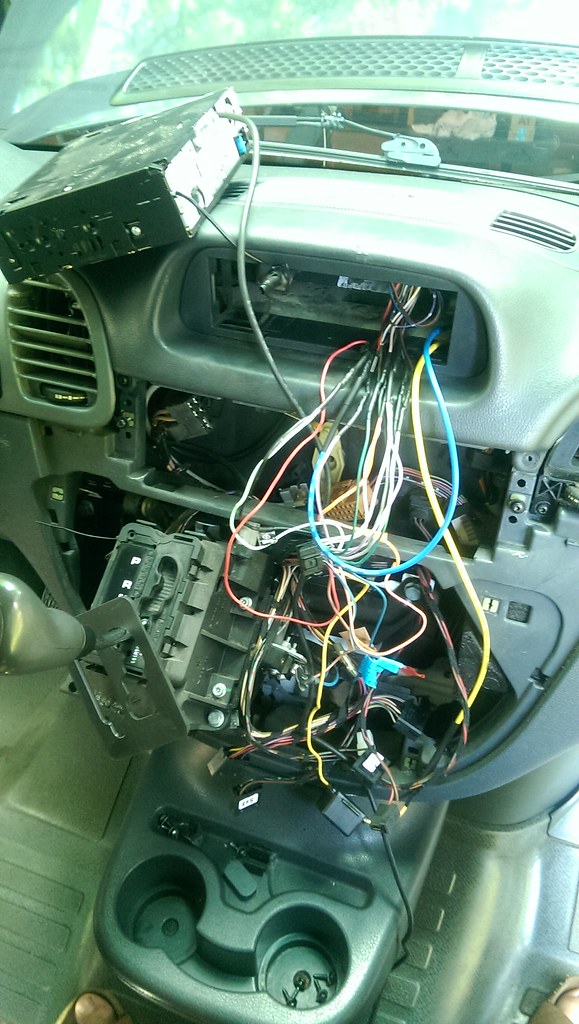
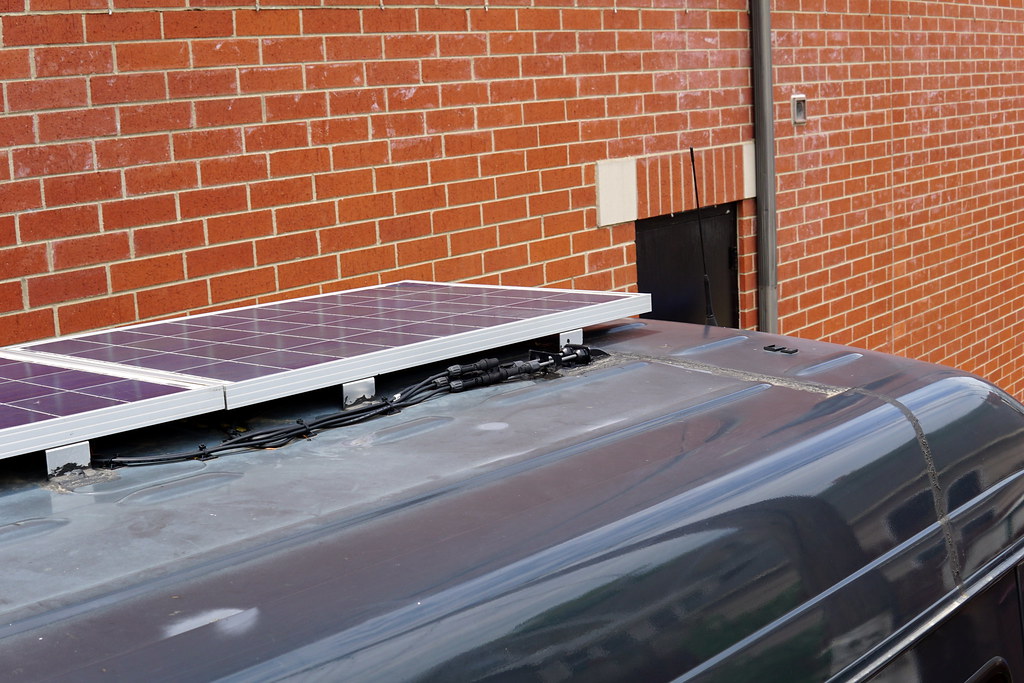
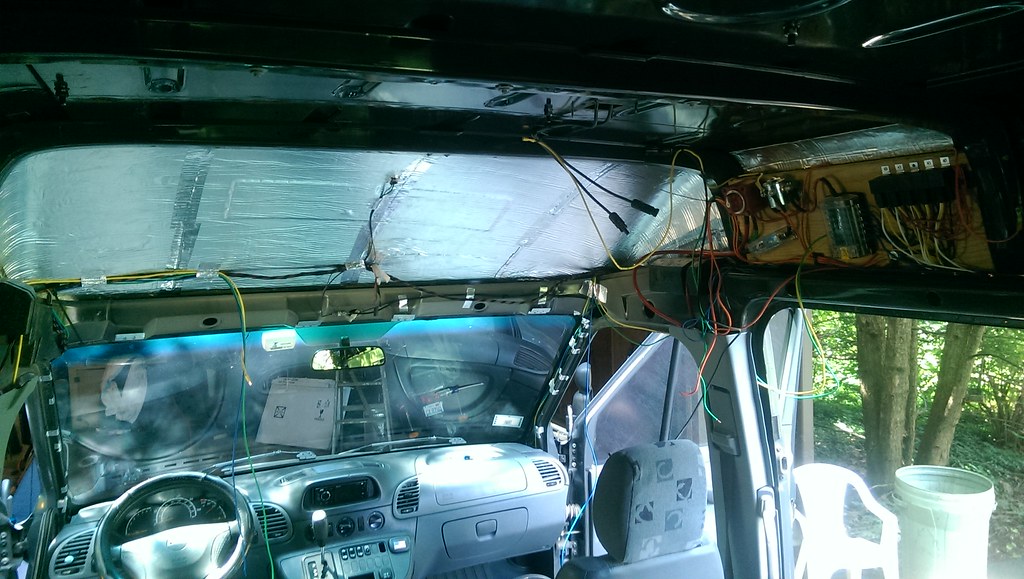
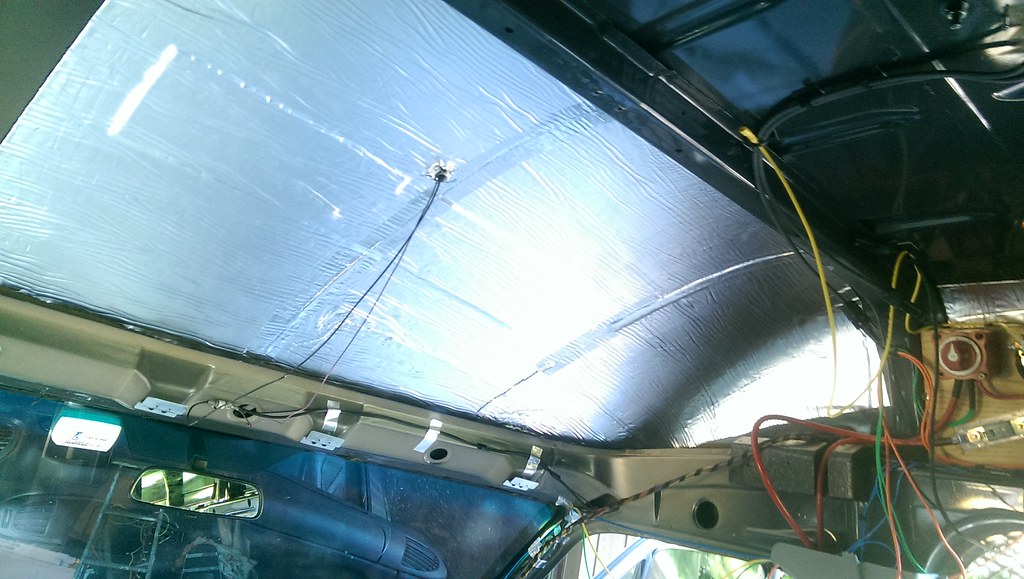
The plan for the electronics were pretty basic at this point. 12v solenoid triggered when the alternator is running (D+ line from under driver seat) would connect the engine battery to the rear AUX battery, which I placed under the front passenger seat for now (cheap deep cycle from walmart for now, I know Ill replace it as the build continues). Solenoid is similar to this one. I know a lot of people like a more complicated solenoid to separate the batteries from each other, but for the most part I leave them disconnected, the solar really keeps the rear battery charged. I added a toggle switch in the D+ line so the solenoid is not always "on/hot" when the D+ is hot. I am sure they are concerns with this type of solenoid, but the previous RV we had (VW Rialta) used a similar system from the factory (VW with Winnebago conversion). Solar would charge the AUX battery through a charger and use 200w (2 panels) of solar on the roof.

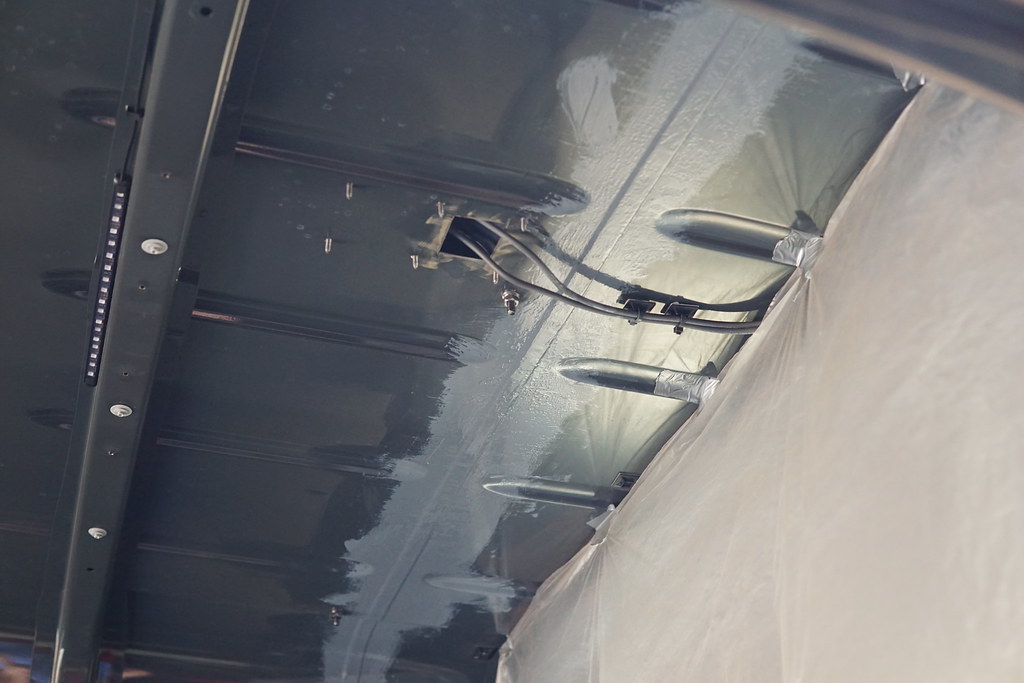
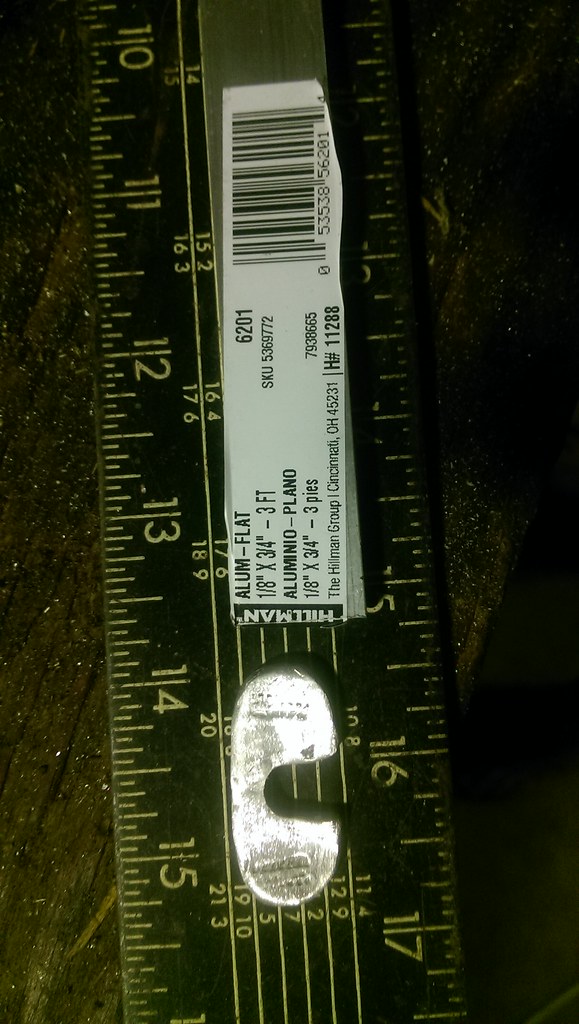
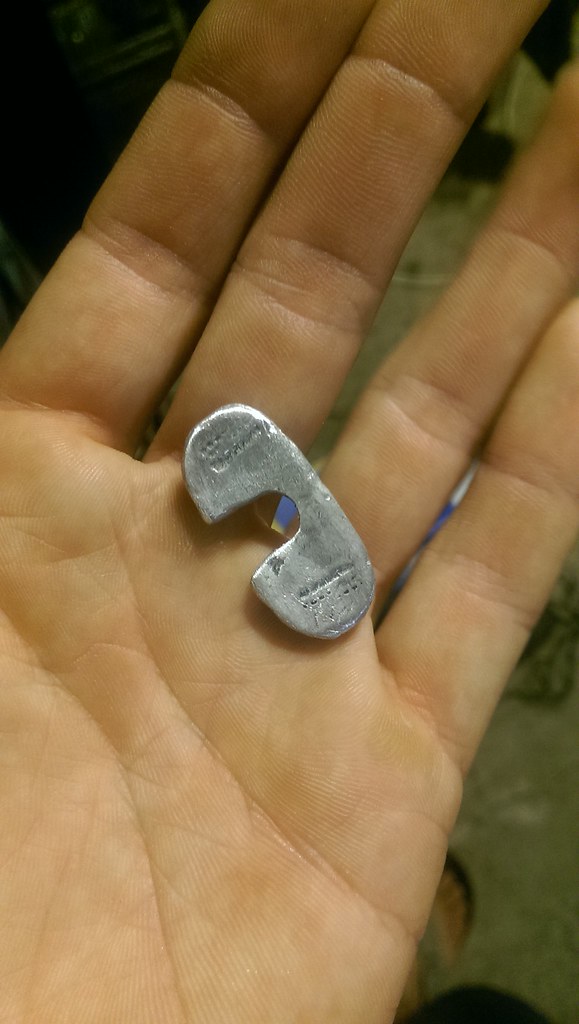
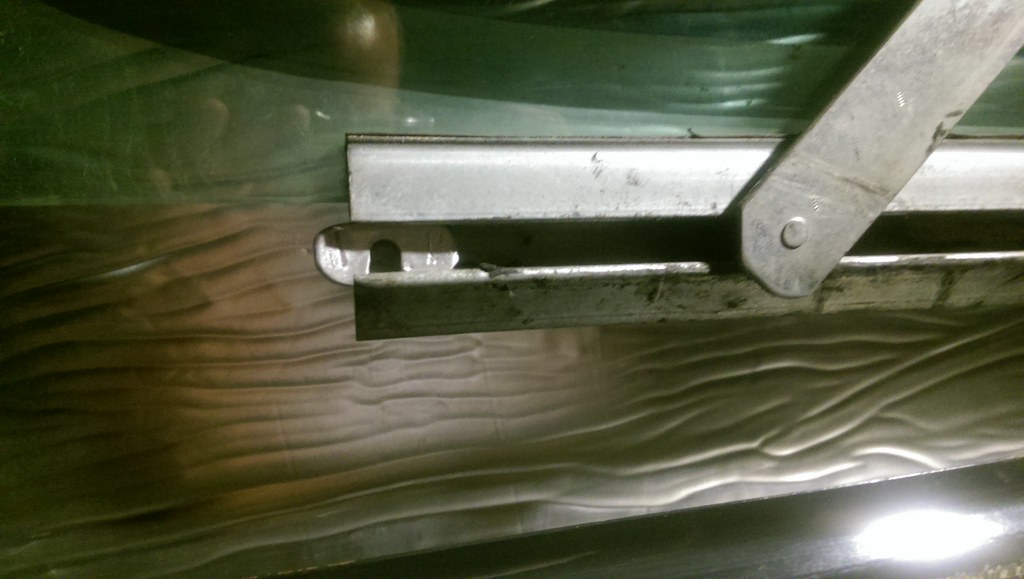
The old AC duct work was removed leaving the roof exposed and the rusting seams... more on that later.
 
Last edited:

alexk243

KulAdventure
I then added all the switches I would need overheard in the headliner (I just like overhead switches).

Switches were for fog light, aux lights, radio (12v to remote line, allowing radio to run when van is off), interior lights (master kill switch), and 12v solenoid (Aux to engine battery connection).


I used this rocker switch panel, which worked great and then just bought the switches off amazon. Most of them were pretty easy to hook up and everything worked and they all glow based on D+ 12v input.

The wiring behind them was a lot easier since I pre-wired them outside the vehicle.


I made a makeshift electronics area above the sliding door on a piece of wood, with all intentions to relocate it, however I like the location as long as I can create an access panel to get into it. My plan was to relocate it under a bench seat, but I knew the bench seat construction was a few years away as I was going to be traveling in it prior to that.


I rewired the radio to run off the rear AUX battery, only connection to engine battery is to the remote line so it still turns on with the vehicle. I also wired up two 12v/USB outlets from the AUX battery for both the front driver and passenger.


USB/12V Outlets from Aux Batt


12V/USB installed in driver side compartment from Aux Batt


Rewiring radio to run from Aux Batt (yellow is power from Aux Battery, Blue is 12v from overhead switch into the remote input)
 
Last edited:

alexk243

KulAdventure
More to come! Ill be trying to upload a few pages a day for the next few weeks. Is going to take me a bit to get all the pictures and links to the stuff I used together.
 

alexk243

KulAdventure
MaxxFan

I am going to apologize now for the lack of pictures in the beginning stages of this project. As the project went on I took much more pictures.

For the MaxxFan installation I followed information from others on this site. It was a bit of a hassle to deal with the ribs (I didn't take any pictures of this process). I used the method of cutting out the square (angle grinder with 4.5" cut off disc) and then cutting a slot in the rib so the rib went above the plastic mounting plate. I made sure to use a lot of the butyl rubber tape to place the plastic mounting plate on and once secure on I used a lot of Self-Leveling lap sealer to seal it all up. The I linked to is the same brand, but I had to hunt down some black lap sealant to match my vehicle, which cost a bit more, but I thought white sealant would look odd on my roof. Wiring to the MaxxFan was pretty easy since its controlled by a wireless remote. Installation was pretty easy and required a little bit on sanding/grinding to get it to fit perfect.

The fan has been in there for a few years now with no leaks. Wasn't sure about the part with the rib as there was a little bit of a gap, but the combination of HVAC foil tape, butyl tape, and lap sealer it has seemed to hold up.

This pictures are taken a lot later in my project, but show the location of the fan and how I dealt with the ribs:

Also note that I used machine bolts and nuts on the corners for added strength and the sheet metal screws on the sides:


Last edited:

alexk243

KulAdventure
Solar

While I was up on the roof I also wanted to install the solar panels. I used Grape Solar panels (2x 100W) from HomeDepot, but you can get pretty decent ones on amazon too. These are pretty similar to what I got from home depot.

Make sure you get the mounting brackets and all solar MC4 wiring before you do the install.

I just drilled through the roof of the van and installed it using the mounting kit. Still holding strong 2-3 years later.

For the solar controller I used a pretty cheap amazon one, but it seems to do the job. I also hooked up in a manor to keep them at 12v, not 24v, although I am not sure it really matters. The solar controller can down it from 24 to 12v if needed. I got a controller for 20amps as that seemed to be enough for my panels, even if they operated at 100%, which they never will (200w/12v=16.7amps @ 100%).


I found a really cool solar cable pass through and cut a square below it, used the butyl/lap sealer to seal it up and used that to pass the solar wires though the roof. I also plan to use this for the future if I end up needing any more wiring on the roof.


I cut a hole in the original headliner to pass through the cables and mounted the solar controller to the headliner so I could see it while driving. Also you can see the solar cables hanging down from the roof:


I know its not a great picture, but its the only one I could find on my computer that shows the roof location of the fan and solar panels. I kept the panels to one side so that in the future I could add something, maybe a rooftop cargo box, to the other side:


The clearance is close between the MaxxFan and the Solar, but it does not interfere when the fan is up.

 
Last edited:

alexk243

KulAdventure
Rearview Camera and Monitor

While I had the headliner off and prior to doing insulation I decided I wanted to wire up a rear view camera. I used a cheap rear-view camera (make sure its rear view so the image is reversed), but purchased one that did not have the backup lines on the screen, I think those are annoying.

I wired it up with a wiring harness similar to this, including a power line in the video wire made it much easier to wire.

Like this one:


To mount the camera I drilled into the top brake light and cut a hole to allow the wire to go into the bottom of the red lens and connected to the harness inside the van. Only concern with this was that it would glow red at night when the brake pedal was pressed, but that was fixed with some electrical tape on the lens.


For the screen, I used a suction cup monitor and found that it worked great for what I wanted. I connected the RCA and the red power line from the rear camera and then attached both the power lines to the D+ 12V line. I did this intentionally so that the camera always runs when the van is on, I really like this method, as opposed to only on when in reverse as I can keep an eye on my bikes or trailer. I also found it very useful when determining when to merge on highways, covers a rear blind spot.

If you don't want it running all the time you could easily add a 12v switch into the D+ line. I will admit it is somewhat bright at night when you hit the brakes.
 
Last edited:

alexk243

KulAdventure
Rattle Trap

While I was in there I decided to rattletrap the entire front end including doors. I made the mistake of doing 100% coverage, which won't hurt, but cost a lot more without much added benefit. I really wanted to quite the cabin down and looking back there was probably better ways to do this than rattletrap.

The stuff I used originally was given to me (hence no logo on it), but when I ran out I just ordered the RattleTrap Fat Matt (80mil thick) from amazon, its kinda pricey so I would defiantly consider if you really need it... and defiantly don't do 100% coverage. From my later research 25% coverage seems adequate to quiet body panel rattle.

As you can see I went way overboard on rattletrap in the headliner:


Rattletrapped the floors:


and the front doors:


Side note, definitely get something like this to help apply the rattletrap, makes it so much easier to adhere:

 
Last edited:

alexk243

KulAdventure
Speakers

For a quick fix to the blown speakers I replaced the stock speakers with these 4" Rockford Fosgate Speakers, which sounded way better. I eventually did blow them out though, not sure if it was fault of the speakers, or fault of me cranking it up too high on 4" speakers...

As you can see I had to bend the taps up on the sides, which worked really well with these. I eventually replaced them with 4" Alpine speakers, but the Alpines had plastic tabs I had to cut off and didn't mount as easily. The Rockford Fosgate's metal tab defiantly made them easier to mount. I used butyl tape to help mount them really tightly in there and prevent vibration from loose mounting, also worked really well.


Last edited:

alexk243

KulAdventure
Window Slider Fix

When I bought the van the previous owner told me that the driver side window was stuck up and he had disconnected the switch and it needed a new plastic tab.

After doing research on here I found that tab is hard to get so went with a method recommended by jmoller99 in this thread of making a aluminium tab.

Based on his idea I got a piece of aluminum I had lying around (1/8" by 3/4"):


Cut it and groud it into shape. Cut out a slot in the middle and sanded it down really smooth.


Then fit it into the window guide, attached it to the arm and made sure to put a ton of grease in there. Not sure what grease I used... either some bicycle grease or hub grease I had lying around.


2-3 years later it is still working great and required no permanent alterations to the arm pin.
 

alexk243

KulAdventure
Oil, Fuel, Trans Filter Changes

Before doing any long trips I went through the engine basics:

-Oil change (Mobile 1 Synthetic)
-Oil Filter (Hengst Filter)
-Water Separator/Fuel Filter
-Transmission Filter and Fluid Change (Used this Fluid and This Filter)
-Air Filter (Mahle one with extra foam pre-filter on it)
-Cabin Air Filter

Full list of all my engine/vehicle maintenance compiled here

I followed other post on here on how to do those jobs. Ill try to post links to other people's write ups on those topics, but there is really good info on here. Everything was pretty much straightforward, However I would recommend reading up on how to drain the transmission and hosing as that was a little more complicated. Also if you don't have a transmission dipstick, make sure you get one for this job.

Used purple power degreaser to clean out the transmission oil pan, made sure to clean off the magnetic in there as well.


Fuel Filter change is pretty straight forwards once you get it out of the vehicle:


Oil Filter is pretty easy also, just be careful as all parts are plastic. I purchased a special oil filter wrench to make it easier. Which I highly recommend:


I also checked for black death... luckily it looked good!


I ordered all the parts through either Amazon or Europarts (has a lot of good sprinter parts)
 
Last edited:

alexk243

KulAdventure
Trip to Colorado with the Pup

With all the stage one stuff done I took it for a few trips and if there is one thing I can recommend to anyone thinking of doing a build, is this:

Take an extended trip in your van before you design the interior.

After my first trip to Colorado and back I completely changed my mind about the design. Things that I thought were important to me turned out not to be and things that I thought were not important turned out really to be important. Couple examples are shower, toilet, sink, indoor bike storage, storage, beds, etc...

These ideas continued to evolve over my trips and I am just getting to designing my interior now (May 2018, remember van was bought in summer 2016).

I realized I needed a shower, just had to, made the trip much more pleasant and enjoyable. Also indoor bike storage wasn't critical, a good hitch bike rack gave me way more space inside. My thoughts on the need for a sink/kitchen/fridge at this point (fall 2006) were still a no... but that would change.

Here are some pictures from my trip to Colorado:

Passing through Gunnison, CO


How I had the interior setup for the time being:


You can see my companion for the trips really enjoyed the bench seat I left in there for her. She comes along on all of the van trips, so that was also something I had to consider during the build. I looked into a lot of options for cooling it while I was away, but really didn't find anything I trusted that was within a reasonable price range. I ended up going with the MaxxFan and these really cool window screens , granted they are very expensive, but did wonders for ventilation in the van when parked. I would never leave her in the van though if the temp outside was dangerous. The fan and vents could keep the van to about 2-4 degrees higher than outside temperature, so I still had to be aware of the temp. Also note the 3 gallon water bowl I left for her in the van (can be seen in the pictures).

That being said I am still exploring options on leaving her in the van in terms of temperature alarms and whatnot. Right now I am not comfortable with an AC system or running the van while gone with the AC on as that just isn't fail safe without an alarm. Did a write up on my suggestions for traveling with a dog and what I do here.

Here are some pictures of the window vents I mentioned about installed on my van:


Also funny to note that while in Telluride, CO they had an underground parking garage that the van could fit in. Was pretty impressed.


Also the van had no issues towing a few ATVs on some gravel access roads to get to some awesome terrain:


For the time being my shower was a camp shower bag hung from a tree, which worked well enough in the wilderness. Not sure if it would fly in a rest stop/Walmart parking lot. When I would mountain bike I would leave the bag full of water on the hood of the van to try and heat up the water for when I returned. It didn't work great, which is why I am in the process of figuring out a new shower method. (you can see my dog leash method of hoisting the bag high enough up for good water pressure):
 
Last edited:

alexk243

KulAdventure
Flickr

Just wanted to note that all of the pictures I uploaded on here are hosted by Flickr. I think they have something in their agreement that states you have to link to them or mention them if posted on third party sites or something like that. So heres that: https://www.flickr.com/

So far so good with the photo hosting. I used to use photobucket, but they stopped allowing free third part hosting.
 

Midwestdrifter

Engineer In Residence
It is surprising how much your needs/wants and tastes change. Many folks who are new at van-life style traveling are pretty minimalist. Especially after coming from tent, car, or backpack style camping. After a while you realize just how much easier, and longer you could stay out and on the road with a few amenities.

Good looking van. What does your layout look like? It sounds like you are a solo traveler (not counting the dog obviously).
 

alexk243

KulAdventure
Good looking van. What does your layout look like? It sounds like you are a solo traveler (not counting the dog obviously).
It's still not done on the interior. The interior is still pretty similar except I have removed the seats, insulated, and added flooring. All that's charged is my plan on what I want to do. I have the computer rendering of what I want the interior to be.

I do a lot of solo trip with the dog, but I have to build it to take a few passengers from time to time. I've done 8+ hours with 5 people and 2 dogs a few times in it and I need to keep that as an option. Probably keeping one of those bench seats able to be mounted. Van needs to sleep at least 2-3, preferably 4, but tents are still an option.

This thread is taking me a while, but I'll get all that up on here soon :)
 

alexk243

KulAdventure
Copper Harbor Harmonic Balancer Failure

Fall of 2016 I took a trip up to Copper Harbor Michigan, which has amazing mountain biking, with two dogs and four people. The trip was amazing and another test run of the van with no interior done. If you are in the Midwest and into mountain biking I would really recommend making a few day trip there. I prefer to go in October, its cold, but no one is there and its such a cool little town.

We stayed in Fork Wilkerson State Park and I think we were the only people in the campsite.


The pups loved it too


I had found a Yakima bike rack on craigslist that fit four bikes and folded away so the rear doors could open without taking the bikes off that worked amazing on the van. I am not sure they make that model anymore though.


However this is when things started to go bad. Towards the end of the drive I had noticed a rattling in the front of the engine, similar to a bad pulley. With no tools I took a look the best I could at the front of the engine.


I had no reception up there, but the diner at a local hotel had wifi and was very helpful. With help from people on this forum I was able to figure out it was my harmonic balancer. The outside weighted ring on the harmonic balancer had come loose and was spinning freely on the balancer. Ended up meeting a guy in their local brewery there and he gave me a phone number for a diesel mechanic shop about 30-50 miles away. So after our mountain biking we limped slowly to the shop.

I had to look up the shop, but it was called Bekkalas Diesel Repair (23862 Oneco Rd, Calumet, MI 49913 - (906) 337-5880). I would highly reccomed them if you are in the area. They were really nice and were able to get me in right away even though they were busy. Both the mechanic and I decided the best course of action was to remove the belt, remove the loose ring, and re-torque the harmonic balancer to make sure it could make the 500+ mile drive home and then just go for it.

You can see the ring they removed lying on the floor:


The van in front of their shop:


We made it the 500+ miles back in that condition with no issues at all, except vibration as you neared 70MPH, so we just kept it much slower and it seemed to be fine.

The write up for my issue and the thread I referenced to figure out the issue and repair for those in the same issue.
 

alexk243

KulAdventure
Harmonic Balancer Fix

Now that the van is back at home it was time to fix the harmonic balancer. I ordered most of the parts from Europarts-SD and at the recommendation of people on here I did not go cheap with the harmonic balancer, I went with the $200 OEM German one. A note on that also; my van has 250,000 miles on it and this will be its third harmonic balancer. The original would have been a dual AC one and the one I am replacing is not the double belt one so it would have been replaced previously, I am guessing with a cheap one.

The big concern with getting it replaced was going to be the torque wrench, I didn't have one that could do the required specs needed (240 ft-lbs and then 90 degree turn of the bolt). I tried going to a local diesel mechanic shop and asked if they could just torque it down for me, but they wanted $700+ because they "had to remove the radiator". So I decided to do it in the alley behind my house and not remove the radiator:


Once you remove the headlights, grill, and other parts (listed in this post), you can push the radiator forward enough to get to the pulley/harmonic balancer. While I was in there I replaced everything, seemed like the time to prevent another brake down. This flywheel locking tool was essential to loosening and tightening the harmonic balancer as it locks the flywheel, would really recommend getting it.

Replaced:
-Water Pump
-Idler Pulleys
-Belt
-Harmonic Balancer
-Belt Tensioner
-New Bolt for HB

Tools Needed:
-Flywheel Locking Tool
-Torque Wrench capable of 240 ft lbs (Cheap One Here, but I actually used the free loaner rental from AutoZone, oddly enough theirs could do 240 ft lbs and it's free as long as you return it right away)
-Sockets
-Large Allen Key Sockets
-Large Breaker Bar

I was able to do this in the alley behind my house without removing the radiator. It is a real tight fit in there and you have to remove the fan, but its doable. I have not had any issues with it since.
 
Last edited:

RVCuisineScene

Active member
Van looks great, I started my "temporary" build out of a 2017 3500 4X4 this past Jan., I came up with a shower/toilet combo which cost around $100 and can be taken down when needed. It worked great on our 3 week road trip in Utah and Arizona here is the link for pics

http://http://kitchenhui.com/road-trip/
 
Last edited:

alexk243

KulAdventure
Van looks great, I started my "temporary" build out of a 2017 3500 4X4 this past Jan., I came up with a shower/toilet combo which cost around $100 and can be taken down when needed. It worked great on our 3 week road trip in Utah and Arizona here is the link for pics

http://http://kitchenhui.com
I like the idea, but I am dealing with a space issue, so I am trying to develop a plan to have a shower that can be completely removed and stored when not in use. Leaning towards some sort of hanging curtain into a shower pan and a loose hose that hangs from the ceiling hooked into the plumbing system. As for water heater, thinking a 120VAC heating coil submerged in a water tank (small and wrapped in insulation) and set to 90 degrees so there is no mixing of hot/cold required.

This is all just in my head still haha, haven't figure out the implementation of it yet.
 

Top Bottom