2019 Sprinter chassis ground location in van?

The body equipment guide shows the same two ground points for the 2109 sprinter as for the previous model: under the driver’s seat and near the rear axel. However the driver seat point (looks like a stud mounted to the floor in the image) is missing on my 2019, there is no other place under the seat that looks like a ground point and no brown wires. There is one at the very upper rear corner of the inside of the van but it’s already fully used.

Can I just use a bolt with a good connection as an alternate (like one of the seat pedestal bolts) to ground my 200 Ah house system and 1000W inverter/charger? Or should I run a ground wire through the floor to the factory rear axle point? Thanks.
 

autostaretx

Erratic Member
Another approach is to use *two* seat pedestal bolts. Spread the load, as it were.
Also scrape/sand off the paint so that your cable ends are firmly seated against bare metal.

--dick
 

mlaureti

New member
Yup - Those are them!
Thanks for confirming!

On a related note... After reading from this forum, I decided to buy the Kisae DMT1250 DC to DC charger to limit the current taken from the alternator to 40 amps (The maximum stated in the upfitter documentation)

I know where to connect the positive terminal but don't know where to find the negative terminal under the seat. All wires are red! :)

Do I need to connect the negative back to the battery? See attached image.

Thanks
 

Attachments

skivo

Member
Thanks for confirming!

On a related note... After reading from this forum, I decided to buy the Kisae DMT1250 DC to DC charger to limit the current taken from the alternator to 40 amps (The maximum stated in the upfitter documentation)

I know where to connect the positive terminal but don't know where to find the negative terminal under the seat. All wires are red! :)

Do I need to connect the negative back to the battery? See attached image.

Thanks
I have the same question actually. On the positive wire, could you post a picture with the correct location for connection ? I have DCDC renogy charger that also needs D+ wire connected to provide signal that the engine is on. I believe I need to connect the positive to the connector that is on when the alternator is running. As I assume is your case.
 

mlaureti

New member
I have the same question actually. On the positive wire, could you post a picture with the correct location for connection ? I have DCDC renogy charger that also needs D+ wire connected to provide signal that the engine is on. I believe I need to connect the positive to the connector that is on when the alternator is running. As I assume is your case.
If you look closely at the picture I uploaded in my question, you will see my drawing. It shows where to connect your positive wire. It is actually the box I am holding in my hands.

That plastic box is located at the back right corner of the metal box. You open that black box and this is where you connect your positive wire.
 

mlaureti

New member
I had to pause the installation of my DC2DC charger and I am coming back to it this weekend! ;) I have seen so many updates with new members and experienced members that keep on answering. This is a great forum.

My DC2DC charger ground will be connected to the chassis on one of the two spots available (See picture below)
1630881968844.png
What about the negative side of my DC2DC charger? It states directly to the battery starter but I don't see any proper way to connect to that negative terminal. Can someone share a picture of how they connected the negative cable? Thanks in advance!
1630881802642.png
 

sebcbien

Active member
Hello,
Here also, chasing ground points :)
I have the 250A alternator option and I have one DC-DC connected to the ground point under the driver seat.
I need to add a Victron 12/1200 inverter under the passenger seat.
The seat bolts are not convenient (size of the bolts) and not a very good ground, even the nut is loose and painted.
Anyway, I found this bolt, soldered, near the foot pedal, near the ground disconnect.
For me it looks like a good ground point.
Any advice ? Did someone have an idea of what is it for ?

1672676133930.png

1672676171996.png
 

sebcbien

Active member
Hello,
I ended up using this "ground point". I just sanded it to have a perfect electrical contact.
To test it, I've drawn 85Amps for 30 minutes from it and it was as cold as the floor 30cm away.
Hope it helps, one more ground point location is cool, probably Mercedes kept this one for "themselves" for some options.
Seb
 

XiangRen

Active member
Hello,
I ended up using this "ground point". I just sanded it to have a perfect electrical contact.
To test it, I've drawn 85Amps for 30 minutes from it and it was as cold as the floor 30cm away.
Hope it helps, one more ground point location is cool, probably Mercedes kept this one for "themselves" for some options.
Seb
Hi, I am looking for the same but I have a 2022. Which one did you use? Could you share a picture?
 

SSTraveler

2014 LTV Unity Murphy Bed
Can someone share a picture of how they connected the negative cable?
If you are installing a Kisae DC-DC charger, the negatives are internally connected by a heavy ground bar, however Kisae still recommends that you jumper the negatives together and take one to chassis ground as the method for grounding the connections.
Screenshot_20230206-072804_Adobe Acrobat.jpg

Since everything is chassis ground either jumper the battery negatives together and take one to the seat base ground bolt or take them individually to the seat base bolt. The first picture is an installation under the passenger seat where the house battery positive and chassis battery positive were brought for an original isolator solenoid installation. The Kisae DC-DC charger replaced the isolator solenoid which was abandoned in place. The second picture is also from an isolator solenoid replacement but all the negatives, including the case ground were jumpered together (10 awg wire) and the old isolator solenoid chassis ground (14 awg wire) and a new seat base bolt ground (8 awg wire) was used. In the last picture the negatives were takien to a common ground terminal and then a common ground from that was connected to the seat base. So there are any number of approaches you can use to ground the Kisae DC-DC charger negative terminals directly to the chassis.
12582.jpeg 20211015_113239_resized.jpg
received_540317888147698.jpeg
 
Last edited:

vrrv

MY21 144 2WD HR Passenger
Are there any ground locations in the rear of the van? Like somewhere close to rear 12V sockets and/or rear wheel arches? Thx!
 

RVBarry

2023 AWD 170 DIY CamperVan
Are there any ground locations in the rear of the van? Like somewhere close to rear 12V sockets and/or rear wheel arches? Thx!
Hi, there's one on the upper corner of the rear of the van (drivers side for LHD).
And there's several under the van.

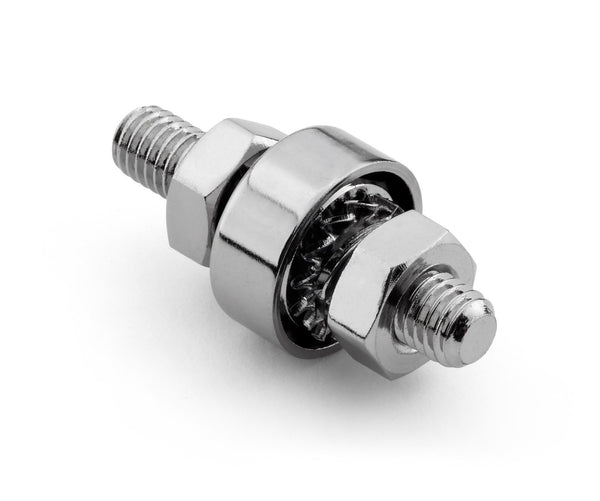
I'll be adding one or two near the wheel well; there's some double-walled steel structure there, and I got 2 of these already:
(they were backordered over a month)

edit: see also
 
Last edited:

spaner

Florence - 144 AWD Cargo
@RVBarry Did you find a good spot for your added grounds near wheel arch inside ? - I picked up a couple of XB and would prefer to send my grounds there vs up the rear or all way to front
 

RVBarry

2023 AWD 170 DIY CamperVan
@RVBarry Did you find a good spot for your added grounds near wheel arch inside ? - I picked up a couple of XB and would prefer to send my grounds there vs up the rear or all way to front
Hi, I'm planning to use the double-wall steel verticals above the wheel well. With some larger washers, probably.
Haven't done it yet.

BTW, some use the floor D-ring cups as ground points.
 

Top Bottom