2011 Great West Van Legend

Davydd

Well-known member
How much do you use your B? Years mean little. We've put 43,000 miles and over 250 nights with ours and we are just starting our third year using it. I couldn't find the OEM switch online so have no idea who manufactures it. The round shaped small toggles are probably the lowest denominator in terms of longevity. I know similar are very cheap to buy. I don't think they are designed for constant use or use as a wall switch. They never felt very strong. Anyway, the replacement switch is readily available. You now know what you would have to do to replace it with another switch. Believe me, making that larger cut opening was a no going back moment.

When we get back from our next trip I am going to look at the possibility of moving the Winegard 12V outlet and antenna booster underneath that switch so you can get to it easily with the sliding door closed.
 
Last edited:

bcislander

'07 Mercedes-badged Dodge
My Legend now has about 53,000 km (~33,000 mi) on it & we have spent at least 120 nights in it in the nearly 2 years since I purchased it. I'm not sure how much the previous owner used it, but it had just under 25,000 km (~20,000 mi) when we bought it. So, obviously not used as much as yours, but not a 'driveway queen' either.

I looked, briefly :smilewink: , at moving the Winegard outlet to near the switch, but decided it was in the 'too hard bin', given how we use the TV. Admittedly, having the 12V outlet more accessible would be handy, but...... I guess that I am a little less driven than you are. :smilewink:

OTOH, I am replacing the bulbs in the front 6 overhead lights with LEDs that I purchased on eBay, but your Legend probably came with LEDs in these lights.
 

Davydd

Well-known member
All 12 of my ceiling lights are halogen but the under kitchen cabinet lights are LED. GMTA, I posted this in the ClassBForum.com last Monday...

We have a dozen 3" round recessed puck ceiling lights in our B with the tiny 10W halogen bulbs.


When we first got the B the equivalent LEDs bulbs cost about 5 times as much. However, they have since come down in price and probably are no more than 50% as much if that. These are the replacement lamps...


You get similar light output at a 78% energy savings and considerably less heat. We have the same recessed pucks under our cabinets with the LED originally installed I assume because of the heat factor.

I've had two of my halogen lamps burn out so far. Now I am thinking of buying some LED lamps and start replacing them as they burn out or just go ahead and do it for all if it doesn't look good intermixed. It probably won't save on first cost but it should help with boondocking and battery savings.

Six of my ceiling lights are on a dimmer switch. What I don't know is will the LEDs work with the dimmer switch?
 

bcislander

'07 Mercedes-badged Dodge
All 12 of my ceiling lights are halogen but the under kitchen cabinet lights are LED. GMTA, I posted this in the ClassBForum.com last Monday...

snip...

When we first got the B the equivalent LEDs bulbs cost about 5 times as much. However, they have since come down in price and probably are no more than 50% as much if that.
I bought similar LED bulbs on eBay for ~$2 ea. with free shipping, from China, of course. :rolleyes:
These are the replacement lamps...


You get similar light output at a 78% energy savings and considerably less heat. We have the same recessed pucks under our cabinets with the LED originally installed I assume because of the heat factor.

I've had two of my halogen lamps burn out so far. Now I am thinking of buying some LED lamps and start replacing them as they burn out or just go ahead and do it for all if it doesn't look good intermixed. It probably won't save on first cost but it should help with boondocking and battery savings.

Six of my ceiling lights are on a dimmer switch. What I don't know is will the LEDs work with the dimmer switch?
I haven't tried yet, but now I have a couple of LEDs 'spare', I'm going to try putting one of those units in a dimmer-controlled light fixture. Most sources indicate that typical LED bulbs won't work with 'standard' dimmers.

If that is the case, I will try to find a dimmer suitable for LEDs. The LED brightness can be controlled by Pulse Width Modulation (PWM). I might even be able to design a dimmer, if the search comes up 'empty'.
 

bcislander

'07 Mercedes-badged Dodge
I installed the LED bulbs in the 6 undimmed fixtures. Very bright & white! Well worth the effort.

I removed the reflectors and trimmed the connector wires to match the length of the halogen bulb wires.

There are lots of LED dimmers available, so I'm going to order another 6 LED bulbs & a wireless LED dimmer to change the 6 'dimmable' lights to LEDs.
 

Attachments

Davydd

Well-known member
I've had on ongoing problem with my bathroom skylight leaking that first reared its ugly head in the Florida Keys. It only leaked when the back was slightly higher than the front and only during heavy rains. So it could be frustrating in that sometimes it didn't leak and sometimes it did. It never seemed to leak when driving and generally it never leaked when parked at home fairly level. When it did leak it came through and dripped inside the quarter round electrical chase cover in the bathroom and then flowed one way or another until it found an outlet. It really became a problem in the Florida Keys when we were experiencing an 8 inch one day heavy rainfall. We had to abandon our stay and head for drier areas. We did manage to get the leak (we thought) fixed at a dealer in Florida. I'm not sure what it looked like before but they essentially frosted the whole skylight with caulk in hope of stopping wherever the leak was. We never encountered any significant rain after the repair on our trip to test it. This is the result.


We got through two months in an Alaska trip after with little or no rain other than light sprinkles. Then this spring in Texas the leak came back the next time we encountered a heavy downpour rain so obviously the "fix" did not work. I removed all the caulking. After I removed the caulk it rained again and it didn't leak. What I discovered is there is a 1/4" gap about about an inch deep between the skylight frame and rain gutter. When I removed the caulk that was filling the gap I found it was not adhering to the metal roof where the skylight met the roof and that there was standing water under the caulk. Rain water was flowing in, getting trapped and then flowing into the bathroom. So all the glopped on caulk was not doing the job. Also, a lot of the caulking came off clean from the surface meaning it was not adhering properly.

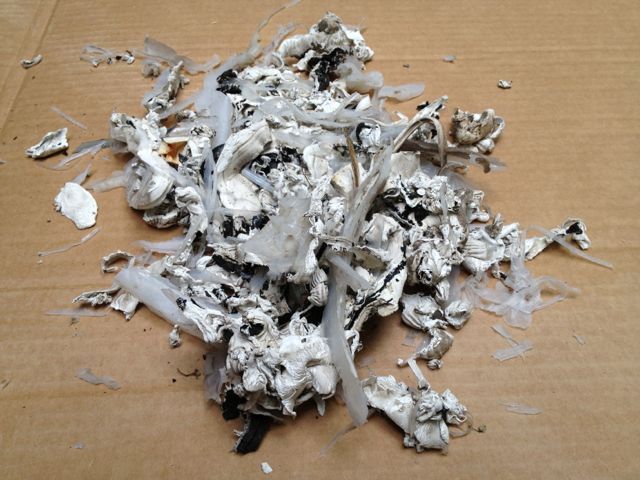
This is some but not all of the amount of caulk I removed. Believe it or not my recaulking used just a half of a tube.


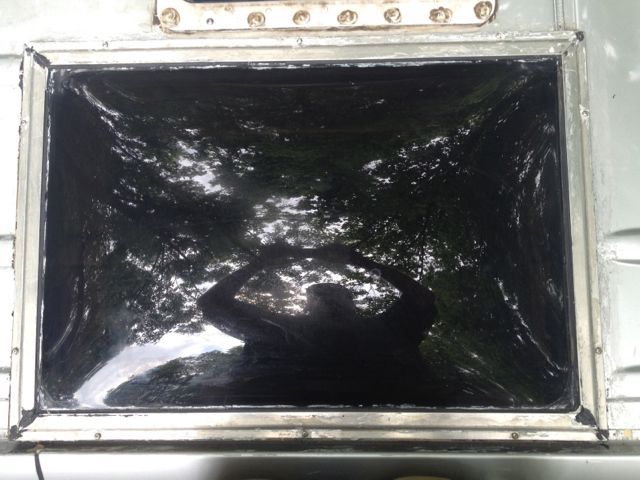
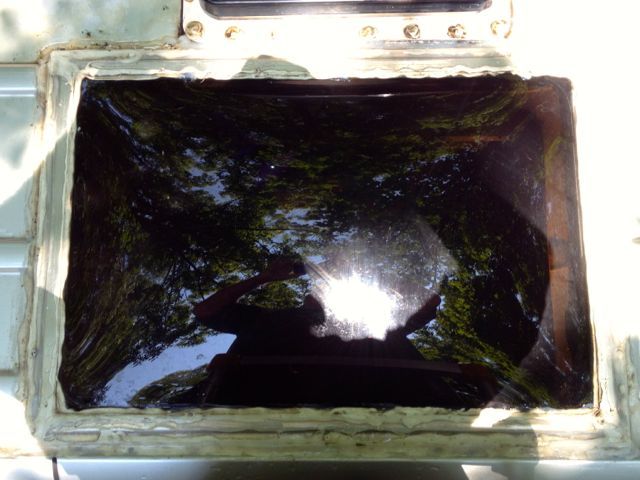
This is the skylight after I removed the caulk with lots of scraping.


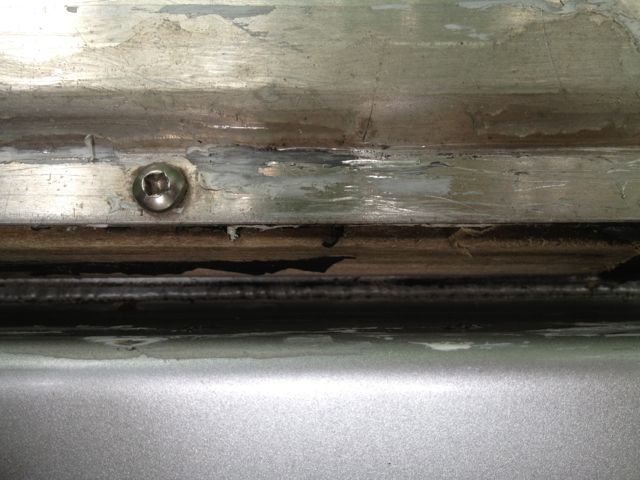
This is the gap and the caulk never touched the metal where the skylight frame met the deck otherwise there would have still been a film of caulk I could not easily have removed.


There is no standard tool to tool a 1/4" x 1" deep joint and a caulking gun nozzle can't reach that depth to press the caulk in place, thus created bridging and no contact at the roof deck where frame met roof. It was a sloppy job and poor design to create a situation you can't tool easily to make it water tight. With the caulk removed the water when it rained was not getting trapped and was flowing by fast enough to not flow into the bathroom, at least in any detectable or appreciable amount. So all the dealer repair evidently didn't fix the original design flaw and poor installation.

Since the skylight seemed to be doing its job without the caulk I opted not to dissemble the skylight even though the extra step might have further helped sealing it at the deck if done right. I just decided to recaulk around the skylight and make sure there was 100% coverage. In order to fill that gap properly I devised a 5/16" wood dowel tool with a rounded tip to push the sealant down into the narrow gap and joint.

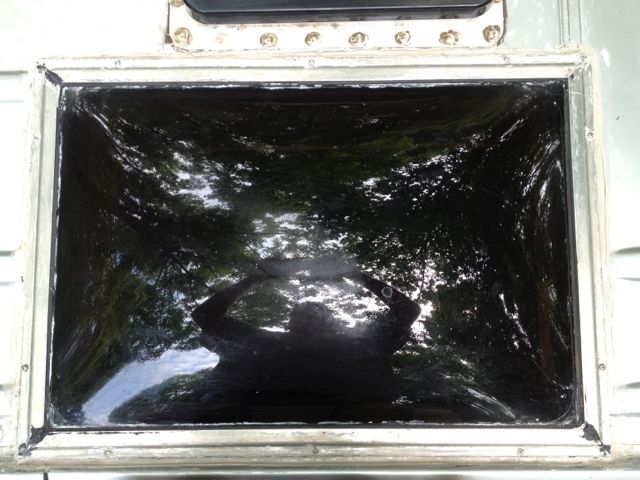
This is the recaulk. Not quite as frosted. I used a better grade of sealant than the rubberized acrylic previously used. This time I used GE Silicone II sealant for exterior waterproofing. It is about 3X expensive than acrylics. But then who cares with one tube.


I took a hose to it with a continuous deluge of water and there were no leaks. Only time will tell and another major rain storm to determine if I solved the problem. Didn't think I would be wishing for rain before heading out on a trip again.

I'm out of warranty. In some respects that is good. I think I know repair better. It's now my responsibility. The light switch I changed out was another example that was replaced once previously under warranty only to fail again.

PS. I got my rain Monday morning. A good half inch deluge. No leaks.
 

Davydd

Well-known member
We just crossed the 50,000 mile mark in a short 2-1/2 years with our 2011 Great West Van Legend, the subject of this thread.

On our current trip we are bringing our 10 year old granddaughter on a thousand mile camping trip. We brought our tent along but on the second night out we had an all night down pour so opted to use the van. Backup solution we had planned ahead was to use a 26" x 75" Therma-rest mattress on the floor. The floor aisle is just wide enough. I'm not sure any other Sprinter B could do this with this size mattress, a remnant left over from our tent camping days.


Davydd

Well-known member
When I jockey around in a campsite I can usually tell just by feel sitting in the driver's seat if I am close to level. To reinforce this I simply use a round bubble level sitting in the ashtray receptor. I found it to be amazingly accurate and can see it easily. This should work with any newer Sprinter. I long ago removed the unused ashtray. I do precise leveling with the Clinometer app on my iPhone.


bcislander

'07 Mercedes-badged Dodge
We just crossed the 50,000 mile mark in a short 2-1/2 years with our 2011 Great West Van Legend, the subject of this thread.

On our current trip we are bringing our 10 year old granddaughter on a thousand mile camping trip. We brought our tent along but on the second night out we had an all night down pour so opted to use the van. Backup solution we had planned ahead was to use a 26" x 75" Therma-rest mattress on the floor. The floor aisle is just wide enough. I'm not sure any other Sprinter B could do this with this size mattress, a remnant left over from our tent camping days.
About a month ago, 3 of us went on a fishing charter & camped out the night before.

My neighbour slept in the same position on the floor, but with 2 Thermarests :smilewink: He's a little older & more 'brittle' than your grandaughter. :laughing:
 

Davydd

Well-known member
There have been questions about storage in a Great West Van Legend. One thing we do is use the stackable plastic milk cartons. They easily fit on top of the wheel wells or on the floor. Being only 11" high the sofa will glide right over them so at night we place them on the floor before putting the bed down. They also stack behind the driver's seat and on the floor of the bathroom, and fit under the sofa when in the sofa position if you want to move them around. I've noticed more recent Legends now just follow the wheel well housing instead of squaring off like ours. I feel that was a regressive mistake.


Davydd

Well-known member
I made a couple of minor modifications today. The Legend has a shelf in the back at the top of the door opening to store things. One thing I stored there was awning crank handle. Also, you'll find a golf umbrella and a bag of pie irons. I've also carried my camera tripod up there and some Nordic walking sticks. Kind of a catch all for long stuff. This year I bought a fishing license and thought maybe on the next trip north I'd carry my casting rod. Looks like I am starting to run out of room. So I put a couple of tab stops on the ledge outside the shelf to carry the awning crank. It actually makes it more accessible. With the door closed it won't fall off that ledge. You can barely see the two clear plastic stops that were left over pieces unused for some Venetian blinds in our house.

The other thing I did was on the mosquito screen. It rolls up and to keep it ramrod straight when rolled up I inserted a 52" long wood dowel at the bottom hem. I had previously just duct taped the dowel to the hemming at the bottom of the screen. This time I opened the seams at one end and inserted it between the two pieces of material and sewed it back up. Now you don't see the dowel at all. I don't know why I didn't do that initially.


Davydd

Well-known member
So are mine.

The table posts are 29" long & the bottom of the lavatory drain is ~29" from the floor.
Maybe your post holder is a little too far forward.
This is an old comeback response. I probably should have checked this earlier but I checked my table post receptors in the back and guess what? The one I complained about the table hitting the sliding lavatory was indeed 1" farther forward. I checked it today by squaring it up with the other like this.


I haven't checked yet if I move it back 1" whether it would solve the problem. Since I am now carrying only one table I may just leave it as is or even remove it. I had a center receptor that I put in and then decided later to remove it. We rarely use the table in the back anyway.
 

Tuktu

2010 Regency GT, Triple E
I was wondering how useful the storage is in the outside bins. I have noticed that the newer GWVs have really made these areas much smaller and I think that may be a mistake. I am sure a person would want to store items outside rather than inside. Maybe a few tools, axe, sewer stuff etc.

Shane
 

Tuktu

2010 Regency GT, Triple E
I have also noticed the new improved sink in the washroom. I think it is going to be hard to access. Does anyone have any thoughts on this new location. I did ask GWV about it but they were not too willing to change it for now due to plumbing etc.

S
 

Davydd

Well-known member
There is but one outside storage bin. It is ample enough to store the 30 foot electrical cord and I even store a second 3" x 10 ft. waste slinky hose with the elbow end fitting for campsite permanent setups in that storage area. I also carry the 3" slinky dump hose in the storage tube without the end fitting for dump stations. Later models show a macerator hose in that compartment like the photo. Later, from appearances in the latest models the compartment seems smaller.


Davydd

Well-known member
We bought two rolls of Aluminum Bubble Foil Insulation and cut them to fit our back windows and back side windows above the vents. I used 2 ft. wide yellow trace paper to place against the window and trace the outline with a pencil to make a template. Cut the tracing paper, recheck accuracy at window, lay over the foil and use a Sharpie pen to to mark the edges. Then cut the foil with scissors at the edge of the pen marks. The fit is so precise that it friction fits nicely but I think I will add some Velcro tabs.

One 10 foot roll was good for the two rear windows and one side window. I needed another roll for the second side window (39" long) and may use the remainder for the windshield.

Now we are ready for the desert Southwest heat and Walmart overnights under the glaring lights. :)


Davydd

Well-known member
This has been a long running thread on our experience, history, modifications and improvements of our Great West Van Legend. It has served us well but we decided we would like to step up into another venture with a new Advanced RV Sprinter Class B. So, this Class B is for sale. How, when, we don't know yet as getting our new B will take a few months, maybe several. We'll keep on truckin' as they say until such time, but if anyone wants to make an offer we are more than willing to listen and change our plans. You'll never read a more chronicled sales pitch on a B as you will here. :)

If curious, our new Advanced RV venture is chronicled here: Advancing Alvar
 

Top Bottom